At the conclusion to my previous update on this epic game, it was 1:30pm August 29. Union forces were pushing up from the south, threatening the Confederate right flank, and to the north, fighting was at a high tempo as the Union attempted to penetrate the Rebel defensive line south-west of Sudley Church.
So what happened?
The outcome is that both sides had exhausted themselves by the evening of the 29th. The Union came close to punching a hole along the unfinished railway line, but worn down by musket volleys and artillery fire at close range, they gradually had to give up their hard won ground and pull back to lick their wounds. The Rebs had largely been reduced to a rag-tag line of defenders by this point, with the exception of the magnificent Forno brigade and its supporting artillery, which proved decisive in unravelling Union ambitions.
To the south, Longstreet's L-Wing had pushed eastward in its goal of seizing Groveton and destroying the remnants of Sigel's Corps, but the aggressive arrival of Porter's 5th Corps, pushing on Stuart's Hill had blunted Longstreet's ambitions, forcing him to commit Jones' Division to delay Porter and - as the situation worsened - bleed off more brigades from the Groveton attack. Superior Rebel command initiative made this flexibility possible.
With both sides grinding to a halt, Roger and I agreed upon a cessation of the battle at 6pm. Here is a snapshot of the outcome:
Jackson's divisions were able to restore the situation along the railroad. In addition, one of his divisions, supported by artillery, staged a belated - and admittedly feeble - attempt to join in the attack on Groveton. Both sides had resorted to close combat around Groveton, with first the Union, then the CSA, experiencing some success in routing enemy brigades. To the west, Porter's troops had been able to push the ragged Rebel line back to north of the Warrenton Turnpike, but this high tide proved short-lived. Worn out by their exertions and stoppage rolls (experienced elsewhere on the battlefield at this time), they had little choice but to pull back.
In this game, we opted for the rule improving Pope's performance rating....and in this battle, the Union experienced quite a lot of success in mobilising the arrival of its forces and mounting timely attacks.
Losses were heavy on both sides: 122 (CSA), 152 (USA).
Further Rebel reinforcements were expected to arrive that evening, but somewhat fatigued ourselves, Roger and I opted to discontinue the battle and call it a day.
The end result? Although the CSA had succeeded in maintaining control of all of its VP locations, it was unable to sweep eastwards to seize the Stone Bridge and New Market. After totalling up terrain points and awarding each other points resulting from our losses, the outcome was +2 VP to the CSA, resulting in a DRAW. Historically, the battle was a minor Rebel victory. Leader losses did not seem to count towards VP in this scenario. Union leader losses were high:
Reynolds (USA) (!)
Hooker (USA) (!)
Reno (USA)
Repl ldr - 9 Corps (USA)
Heintzelman - 3 Corps (USA) wounded
Sykes (USA) wounded
For the CSA:
Talliaferro (CSA)
A.P. Hill (CSA) (!)
Wilcox (CSA) killed
Major ramifications for Gettysburg here.......
It was a great experience to set out to tackle an entire battle using the CWBS system. I continue to really enjoy the command system and the uncertainties it presents. The combat system is also superb, giving one the sense of being locked in a struggle, one in which you have a small window of opportunity for 'glory' until your own forces are themselves ground down.
On the downside, the degree of book-keeping demanded by the system began to fatigue both of us, so we look forward to trying The Gamers' streamlined version of this system some time in the future. Thanks again to Roger for participating in this major venture - salute!
I'm striking while the iron is hot today, quickly following up from my last post with a Battle of 2nd Bull Run (Second Battle of Manassas) update.
The previous update presented a snapshot of how the situation looked at Noon on the 29th of August, 1862. Along the unfinished railway line, Hill's division was doing its utmost to fend off a concerted attack by two Federal corps. Meanwhile, to the southeast, Lee's L-Wing has arrived and deployed along Pageland Lane to await further orders. Further south, a Federal column - Porter's 5th Corps - is winding its way in a north-westerly direction....possibly towards Gainesville.
An hour and a half later, the battle is in high tempo...and so is the carnage. Along Hill's defensive line, the two sides have been slugging it out, inflicting heavy casualties. It's become a brutal and desperate gamble to see who cracks first. A number of brigades have been whittled down to rag-tag shadows of their former glory. Fields' brigade has been destroyed, survivors streaming to the rear.
The butcher's bill is reflected in the toll on senior commanders too. Since noon, AP Hill, Reynolds, Hooker and Reno have all been killed or wounded.
Here is the situation along the northern stretch of the unfinished railroad line, at the commencement of the Confederate 1:30pm turn:
Some of the Union brigades at the southern end of the assault have pulled back after a failed (or one may say successful) stoppage roll. Just to the north, Branch's Rebel brigade is about to collapse, offering the Union a tantalising opportunity to breakthrough...IF they can still bring sufficient force to do so. Aware of this eventuality, Lee had issued Evan's Brigade with a divisional goal to support Hill's (RIP) beleaguered position. Evans' fresh troops may be sorely needed.
To the southwest, things are rapidly hotting up. After a minimum of delay, Lee was fortunate to have his orders quickly accepted by Longstreet. Most of his corps is now pushing eastward, threatening Sigel's already depleted troops with the prospect of a knockout blow. But Lee has worries of his own. Porter's Corps is even now approaching Jones's screening troops deployed around Stuart's Hill. What will be the Federals' next move?
The battle is now at a critical juncture. To find out who will prevail, stay tuned for the next update.
Roger and I have decided to play the entire battle of 2nd Bull Run. We're playing August Fury II, from the Three Battles of Manassas game, which is part of the Civil War Brigade Series (CWBS) from The Gamers.
It's NOON on the 2nd day of the battle. Here is the situation (Each number corresponds to a number on the map):
1. About mid-morning, Lee and Longstreet arrived with the entire L Wing, intent on joining up with Jackson and his beleaguered J Wing. By noon, they have deployed along Pageland Lane. They await further orders from Lee.
East of their position, Franz Sigel's 1Va Corps has gone on the defensive, after pulling back from an earlier attack that had bent back Jackson's right flank and forced Stuart into an emergency retreat.
Jackon's boys on his right are grateful for the rest. Prior to Sigel's attack, they had been on the attack themselves late on the previous day, near Brawner's Farm - forcing back Hatch's 3Va to south of the Turnpike. Badly cut up, the 3rd Va was withdrawn during the night.
Here's a close up of the situation at '1':
2: Earlier in the day, the pressure had been on Jackson's right wing, but now the left under Hill is on the receiving end, with the successful arrival and activation of the Union 3rd Va, 3rd and 9th Corps. Pope is also on the field (Playing the Union, Roger opted to use the optional rule increasing Pope's command rating from 0 to 1).
Both sides have been dishing out hell now for a couple of hours. The Rebel position along the unfinished railroad is hard pressed, but holding so far, despite the destruction of Field's Brigade. The Confederates have seen off Reynold's bruised 3rd Va - Reynolds himself wounded and Seymour's brigade has routed. The Union has just renewed the attack, with troops under the command of Kearny, Stevens, and Hooker - whose brigade under Grover has been whipped up by Rebel fire into bloodlust (BL).
Here's a close-up of the situation at '2':
As the fighting intensifies, to the south, another Union formation arrives: Porter's 5th Corps!
Rebel scouts report that it is marching north-west along the Manassas-Gainsville Road.
An update will follow as our own rendition of this epic battle plays out........
As it turns out, rather than a 'Part Two' report of this scenario, it's more appropriate to term it a 'postscript'. In our version of history, Longstreet proved to be far less reluctant to take the fight to the enemy, sweeping eastward - eventually with most of his corps - to engage Brig. Gen. John Reynold's depleted division of Pennsylvania reserves at New Market.
By 14:30, Reynold's division had been almost totally wiped out - with only the last remaining batteries of divisional artillery escaping capture. Reynolds himself fell into Rebel hands.....sparing him from his fateful meeting with destiny at Gettysburg! A Union relief column from the south - under Hatch - could not arrive in time to prevent the rebels from capturing New Market.
This is how it looked:
Immediately to the north, Jackson's divisions (Ewell, Taliaferro) pushed eastward, forcing back Franz Segel's beleagured 1st Va Corps. The force of the Rebel attack routed 2 brigades and their supporting artillery, panicked Federal troops swarming over their supply train as they fled. By 2:30, the Confederates had seized Chinn Ridge, before their orders directed them to advance towards New Market.
Further north, Pope attempted to break through the line of A.P. Hill's defenders still manning the unfinished railroad. Unaware of the situation elsewhere, he still thinks he's on the verge of a major victory and pursuing a defeated enemy! Kearney's division and Reno's 9 Corps advanced to try and force their way through near Sudley Church, but dug in, the Rebels proved a nut too tough to crack, driving off the blueshirts and wounding divisional commander Isaac Stevens in the process.
The situation at 14:30:
With the Union army scattered across the battlefield, unable to contend with the rapidly evolving situation, we elected to discontinue the game.
The post mortem on this scenario is that the Union seems doomed for defeat thanks to the initial orders issued by Pope. These orders largely consign various Union formations to piece-meal, un-coordinated attacks - often against Rebel defenders holding superior ground - that rob the Union of any real chance to deliver a telling blow.
As mentioned, Pope's 0 leadership rating - and delay in arriving on the scene - makes it very difficult for the Union player to successfully change the above situation to avoid disaster. Much also rests on how quickly the two sides can bring in their reinforcements. We opted for the variable arrival rules, requiring a 10+ to be rolled for each formation. Unfortunately, the dice did not go in the Union's favour. In contrast, the Confederates were able to bring up Longstreet's corps pretty much on schedule. With Lee and Jackson's high command values, the Confederates proved much more effective at responding to the battlefield situation and seizing opportunities.
We certainly enjoyed playing this, especially given the uncertainty surrounding the arrival of formations and the potential that exists for manoeuvre.
Coming out of this, Roger and I have decided to try our hand at the full battle of 2nd Bull Run! The hope is that the much longer time-frame will allow the Union commander more opportunity to formulate and prosecute a cohesive offensive against those vile Rebels!
Hot on the heels of our completion of a 1st Bull Run scenario from Three Battles of Manassas (MMP/The Gamers), gaming buddy Roger and I elected to graduate to a larger scale battle, allowing us to make full use of the Civil War Brigade series command rules. Logically enough, the choice was a scenario from August Fury II, covering the 2nd Battle of Bull Run: 6.2 The Second Day.
We opted to increase the uncertainty by adopting the variable arrival rule for reinforcements - requiring 10+ to be rolled before each due formation can enter the fray.
Here is a Vassal snapshot of the field of battle and objectives at 5am on the 29th of August, 1862:
Thanks to Pope thinking that Jackson is retreating westward, Union troops face a tough job in what amounts to hurried and piecemeal assaults against a Confederate corps holding strong defensive ground. Not only that, but one expecting reinforcements to soon come a marching down the Warrenton Turnpike.
As the initial orders for the Union corps have already been accepted, the Union player has little choice but to follow through in the hope that the rebel line can be penetrated. Attempts could be made to exercise divisional command initiative, but the odds are not good and there is an element of risk (rolling snake eyes activates the 'loose cannon' rule, allowing the opponent to control said division for one turn!).
The Union troops advance and carry out their assault.
7:00 am
Here is the situation two hours later:
On the Union left, the Rebels are pouring fire into Reynold's division...so much so, that they are already running low on ammo! But they are getting results and Reynolds' boys are crumpling under the withering fire...but not before Union artillery deal out some harsh treatment to Johnson's extended line (in the current turn, he will become disorganised).
Meanwhile, Sigel's corps has elected to ram into the centre of Jackson's line, hoping that a solid push on a narrow front will get results. The Rebs are dishing it out and Schimmelfennig's men have pulled back, disorganised. Yet, the Union are scoring hits too, with Trimble and Archer's veterans bearing the brunt.
The Union desperately needs its awaited reinforcements to arrive - now! But instead of Pope and two welcome corps, all that has shown up so far is Kearny and his three brigades, now advancing to join in the attack.
And Jackson is still alone...no sign of Lee and Longstreet.
9:00 am
Two hours later, little has changed. Kearny's brigades have badly bruised themselves attempting to push back A.P Hill's brigades defending south of Bull Run. Reynolds succeeds in cancelling the attack and has pulled back to Groveton to lick his wounds. In the centre, Union troops have sent Trimble packing, forcing him to abandon the railroad line....but Early and Gregg promptly fill the gap, robbing the Federals from securing their hard-won gain.
And off to the West, there are signs of an approaching column, while still no relief in the East for the Union.
11:00 am
By 11am, Lee and part of Longstreet's L-Wing has appeared on the scene and deployed on the Confederate right flank, forming a hinge. Un-nerved by the slaughter, Sigel has called off the attack (via a stoppage roll) and pulled back in front of Chinn's Ridge, east of Groveton.
Finally there is significant Union activity in the South, as Porter's 5th corps advances NW up the Manassas-Gainsville Rd. It has orders to occupy Gainsville to hold any rebel advance from the west. But the cat is already out of the bag!
13:00 hrs:
By early afternoon, Porter's corps has taken up position at Gainesville, waiting for rebels that have already passed them by. In fact, Longstreet's entire corps is now on the battlefield - half moving to a rendezvous with the Federals at New Market, while the rest are blocking the Manassas-Gainsville Rd.
As both Lee and Pope are on the map, each can issue orders to their commanders as soon as their HQ's take up a position. Just west of Groveton wood, two of Jackson's blooded divisions have received orders (Jackson initiative) to push Union troops off Chinn Ridge and move on New Market. It looks like a pincer movement....Civil War style.
Pope has appeared east of Hill's position....but it's too little, too late.
My next instalment will reveal how the rest of the battle plays out. So far, the result seems to generally reflect that of history: piece-meal attacks robbing the Union of the cohesiveness it needs to overwhelm the rebels, in tandem with an inability to swiftly adapt to the rapidly changing situation. The rebels get a jump on them, sweeping eastward in superior numbers. Jackson's high initiative value plays a telling role here, as does Lee's overall command superiority ('4' to Pope's '0'). Porter sitting there out west at Gainesville, doing nothing.....seething at the idea of taking orders from boastful Pope! In the end, it cost Porter his command...and career: court-martialed and cashiered from service.
In June and July, local gaming buddy Roger and I decided to get acquainted with the Civil War Brigades series of games from The Gamers/MMP, by starting - logically enough - with the battle of First Bull Run. The battle is otherwise known as First Manassas.
To ably set the scene, I recommend a spot of period music. This is Richmond is a Hard Road to Travel - set to photographs and performed by the brilliant Bobby Horton:
We played scenario 6.3: First Battle of Bull Run, from the excellent Three Battles of Manassas game.
I played the Union, while Roger took the Confederates.
This map, taken from our Vassal game, shows the situation north and south of Bull Run at nine in the morning of July 21st, 1861:
Commanding the Union, General McDowell had initially sought to turn the Confederate right flank, but discovering it to be heavily defended, he then personally travelled westward (the Union had no cavalry to speak of) to seek an opportunity on the Confederate left. This delayed an already postponed attack, allowing further rebel brigades to arrive. In fact, Beauregard had intended to launch his own surprise attack, further downstream, on the morning of the 21st.
Finding the Sudley Springs Ford unguarded, McDowell hatched a plan to send two Divisions across the Ford and down the Manassas-Sudley Road, while Tyler's 1st Division created a diversionary 'demonstration' near Stone Bridge.
So, as the scenario opens, having already received their orders, my Union troops are beginning to cross Bull Run at Sudley, while Roger is sending Evans and a handful of other CSA Brigades towards Mathews Hill and Dogan's Ridge, north-west of Henry House Hill.
In this game, each turn represents half an hour. Fast-forwarding the game, here is the situation north-west of Henry House Hill, at 10:30am:
The rebels are preparing a reception committee for the advancing US troops, with Bee and Bartow extending their line. 'Shanks' Evans traded fire earlier with the Union vanguard and has staged an emergency retreat, his men already complaining that ammo is running short.
The fighting intensifies as the Federals push on Henry House Hill. This is the situation as the Union prepares to move, an hour later - 11:30am:
Bolstered by artillery, Evans has taken up a defensive position on Henry House Hill. Wade Hampton's finely uniformed 'Legion' (one of the South's richest men, Hampton financed and equipped his own brigade) has arrived and taken up position alongside Evans. Stuart's cavalry (which can act independently, requiring no orders from senior command) guards the road east of the Hill, in case the Union First Division makes a move to cross Stone Bridge.
Bee's boys have just taken a full Union volley and routed down the Sudley Road, before gaining some cohesion (now marked 'DG' - disorganised). Beauregard has arrived too. His presence means that orders can quickly be relayed to troops in his vicinity. But whether they'll be promptly obeyed....or obeyed at all, is up to the dice gods.
During this turn, Hunter's Division continues to cross Young's Branch, and Heintzelman's 3rd Division marches along Sudley Road, soon to add to the push for Henry House Hill.
Meanwhile, over on the Union left, I tried to kick Miles' Division into action by rolling for his initiative. Not an easy thing to do as Miles is rated '0' for command, meaning that only a 12 on two dice would succeed. Well, I succeeded alright.....for the rebels that is, rolling a double one! This delivered a 'loose cannon' result, meaning that instead of me, Roger could order Miles! He promptly sent Miles' division on a merry goose chase into the forest due east of his position. Such an order applies for one turn. Looking up the history, I was amused to discover that Miles had been reprimanded for being under the influence of liquor at Bull Run....so this was a great example of game-play mirroring history!
At midday, the battle reaches a new level of ferocity as Union troops storm Henry House Hill, in an attempt to dislodge the Rebs and seize the position before Confederate reinforcements - including Jackson - can arrive. Brigades under Porter and Burnside are locked in close combat with the hard-pressed Rebs under Evans and Hampton. Here is the result, after resolving close combat and completing the Union move:
With the support of his artillery detachment, Evans succeeds in repelling the Union assault. Shaken, Porter's boys retreat one hex. Further along the ridge, it's a better story for the Union. Ramming into Hampton's thin ranks, Burnside's shaken brigade dislodges the Rebels from the crest of the Hill.
For those of you unacquainted with this game system, you may be puzzled by the absence of 'attack' and 'defence' strength values on the counters. One of the cool aspects of Civil War Brigades is that the fire strength and losses taken by brigades is kept secret, with each player keeping records of strengths, casualties and stragglers on their respective Loss Charts.
Back to the battle. The Rebels are now in a precarious position on the Hill....and throw everything they have into a defensive volley.
Pow: Rebel defenders overlooking the Manassas-Sudley Road lay down a scathing fire, sending Porter's extended line reeling back, disorganised, with some troops fleeing the field. In game terms, I rolled a 62 and 56 for each unit respectively. The first number counts as '10s' - and the higher the number, the worse the result for the defender. Ouch.
Pow: Hampton's ragged ranks only manage a morale check on Burnside's victorious brigade on the crest of Henry House Hill. I'm relieved, then roll for morale. It's a:
66!
That's the worst result possible and Burnside's boys erupt in panic and rout!! Victory is cruelly snatched from their grasp and it's an ugly spectacle for the civilians who have travelled from Washington to view the battle. I guess Burnside's boys must have looked sideways and seen Porter's troops skedaddle....and thought it was a damned good idea!
Due to the rout, Burnside can no longer maintain an extended line, so the brigade collapses and runs for the rear, failing a rally roll to send them streaming northward. Little do they know that Stuart's cavalry is waiting for just such an opportunity.
Within the next hour, Burnside's brigade will be completely eliminated, mown down by cavalry volleys in their flank and rear.
While this is happening, I got lucky with McDowell's orders to Tyler's 1st Division being accepted after only a short delay (I rolled a 1 or a 2 on a single die). Tyler is instructed to cross Stone Bridge and join the attack to seize that damned hill! His brigades move out.
Fast forward to 15:00. Here is the situation on the Hill:
After their first assault is repelled, the arrival of Heintzelman's division - AND Tyler's division from the east - steadies the troops. Beside the Hill, Tyler's boys put increasing pressure on the Rebels, pushing them back and threatening to out-flank their Hill position. Jackson's arrival has shored up Rebel defences at the western end of the Hill, but without more troops, there is little the Confederates can do as the Union pushes further around the Hill.
At least in terms of this game, Jackson and his brigade are not going to have an opportunity to earn their famous 'Stonewall' sobriquet!
Eventually, the writing is on the (stone) wall and Confederate command decides to stage an emergency retreat (allowed when threatened by destruction or being surrounded), taking up positions south of the Hill. Further to the rear, Bee and Evans lick their wounds and recover stragglers.
While this is happening, fighting has broken out to the east - namely between Miles' division and a handful of CSA brigades under the command of Joseph E Johnston. After some delay, Miles had finally accepted my orders to advance down the Centerville Road so as to deter the Rebs from sending further forces to assist Beauregard. However, realising the poor quality of both commander and the bulk of his troops, I made it clear that should they face resistance from the enemy, then they were to adopt a defensive stance aimed at preventing the Confederates from moving northward.
At this time, Johnston's brigades have accepted his orders to attack northward, so the two forces are now clashing just north of Blackburn's Ford.
By 1830, this is how the battle has progressed:
By this time, the Union has consolidated its position on Henry House Hill. Most of the brigades are pretty beat up. Their original orders to take the Hill have been fulfilled, so they have gone on the defensive and set about recovering stragglers and distributing ammo. However, to keep the Rebs on the hop, I ordered Hunter's division to head west to Groveton, then swing south, along Lewis Lane and Compton's Lane, so as to threaten New Market from the west (black arrows, above).
Further east, the Confederates have succeeded in routing one of Miles' brigades and pushing his division northward, though at some cost to themselves.
With evening gathering, a zealous Hunter sends in Porter's relatively fresh (but small) brigade against Ewell's extended line, his boys charging to engage the grey ranks in close combat. Yet, the Rebs prevail, sending Porter's boys reeling back. Ewell's men follow up with musket and cannon fire, wiping out Porter's gallant brigade. Severely chastened, Hunter beats an emergency retreat.
The game draws to a close at 20:00. The Union is awarded VPs for holding Stone Bridge and Henry House Hill. After taking mutual casualties (points awarded for wrecked brigades) and occupying strategic objectives into account, the final result is a victory for the Union. Huzzah!
A great first game in our exploration of the Civil War Brigade series. On to Richmond!!! Ah, well...not quite yet....On to Second Bull Run!!
An emerging crisis on Henry House Hill as the Federals seek to outflank Jackson
I've always been interested in the American Civil War and dabbled with various gaming systems that attempt to simulate it. What drew me to this title from The Gamers' 'Civil War Brigade' (CWB) series is that this family of games sets out to capture the uncertainty and chaos of command that so plagued warfare of the period. In addition, Manassas is a good starting point as it includes the first major engagement of the War - First Bull Run (July, 1861). Low counter density and a simplified command system reflect the nascent and ad hoc quality of the forces that took part in this early battle. All of this is great for introducing new players to the series.
In contrast to FAB Bulge, Manassas is at the tactical end of the scale. Infantry units represent brigades of various size, with attached artillery units in which a single strength point equates to several guns. In First Bull Run, the Union is organised into divisions, each with its own commander. CSA forces are more loosely organised, and can be activated by their own brigade commanders, or receive instructions directly from their Army Commander (Beauregard or - once he becomes active - Johnston).
In this game, players secretly write their orders down, then hope like hell that they'll be swiftly carried out. The problem is that - just like in the War itself - getting units to obey their orders is fraught with uncertainty.
A player can either attempt to get subordinate (eg brigade or divisional) leaders to exercise their own initiative, or they can have their Army Commander (eg McDowell) issue orders. Getting your brigade leaders to use their initiative is good in theory, but in practise you generally have to roll really high to succeed. For the Union, most leaders need a '12' on two dice! As you would expect, it's somewhat easier for the likes of Thomas Jackson (who would earn his famous 'Stonewall' sobriquet) on the Henry House Hill featured in the above picture) to activate, but still no cake walk.
The more likely method is to have your general issue orders - but of course it takes time for orders to travel to their intended destination, depending on the distance. Each turn in the game is half an hour, so it may take several turns for orders to be received. Then what happens next is determined by rolling the dice. If you are lucky, the orders are accepted immediately. More likely, they will be delayed (ie you need to roll a 1-2, or even a 1 in ensuing turns to get those danged orders accepted). It's also possible that your orders will be rejected!
This system certainly enhances the excitement....and helps to develop a real narrative, an aspect I highly value in games. I'll do a proper game report on this title on another date, but will make the point now that the combat system is excellent, allowing units to extend lines and either close combat or fire on units, resulting in them testing for losses, straggler and completing morale checks. Although generally larger in size, the Union brigades in particular were brittle in this battle, so it generally doesn't take long for them to reach their 'wrecked' limit. In rolling morale on two dice, one die is the '10s', and rolling in the '60s' (double six is 66 for instance) is almost bound to have your brigade rout and run for it!
I'm really enjoying this system and look forward to future scenarios and battles! Highly recommended.
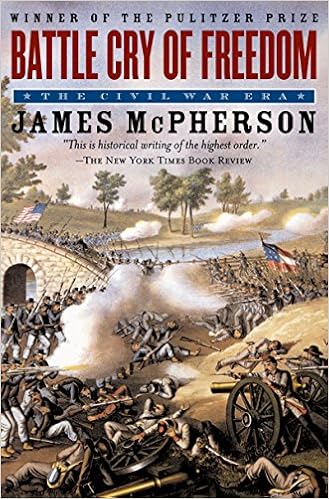
If, like me, you like to enhance the gaming experience by diving into the history behind the simulation, I highly recommend what is considered one of the finest single volume histories of the American Civil War:
Battle Cry of Freedom by James McPherson is a truly impressive tour de force in telling the story not only of the actual conflict, but in revealing the forces that in the years and decades before the opening salvos at Fort Sumter, made the War all but inevitable. If you are seeking a detailed account of the Battles of Bull Run, then this book is not it, but McPherson's weighty tome is a core reference work for the entire conflict.


