Long-time gaming buddy Roger and I have recently turned our gaze to playing several games of the classic WWI CDG 'Paths of Glory'. I've played the game on and off over the years, while for Roger, this is his well overdue introduction to a game that perhaps more than most offers that beguiling blend of agony and ecstasy. In PoG, there is that frequent sense of 'so much I want to do' - now - but being only able to do one thing at a time.
In our first game, I took on the CP and it felt like a largely mediocre performance. The CP gained in the north on the eastern front, but the arrival of the Russian CAU Army set in train a steady demolition of the Turkish position. Then, by about early 1917, the Allies overwhelmed the Germans in the West and I folded after they were well into occupying Germany's west. Despite having played this game about 7-8 times, I've never reached the Total War phase, and this was no exception.
So, we changed sides for our next game, this time adopting the Tournament Rules. The removal of the entrenchment marker in Brussels helped the CP push westward and they were able to reach the Channel and dig in. A very effective strategy. Meanwhile, neither side had made any real gain in the east, with the Russians holding Warsaw with 3 armies. Gradually, however, the Germans and Austrians built up their forces in the east and, by the Fall of 1916, they had the Russians on the back foot - as this screenshot shows:
As a result of the increasingly dire situation in the East, I decided to adopt a strategy of attempting to seize the initiative by setting the agenda on other fronts. Firstly, I did this in the NE, bringing the CAU Army into play and using any opportunity available to push deeper into Turkish territory (with a sense of deja vu as this is exactly what happened to me, in the previous game!)
Thanks to the Allies having the final card play of each turn, I was able to isolate a number of Turkish corps and seize control of a number of spaces through attrition.
Of course, my opponent's own strategy was similar to my own - in this case, preventing the Allies from having any real opportunity to push an aggressive agenda elsewhere on the map, by keeping the pressure on Russia. Even if Turkey were to be knocked out, I wonder if their loss would be catastrophic to the CP cause. There are not a lot of VP spaces there.
Meanwhile, things were tough in the West. The Germans were well entrenched in their forts and in Liege. The only way I could see making any headway at all was to simply try to launch a series of slugfest attacks to wear the Germans down and soak up replacements...and thereby keep the heat off the Russians. I also had a number of CC cards, allowing +1 drms to Allied attacks. Time to use them.
The first chance I got, I moved a French army and the BEF 5-3-3 into that notorious killing zone: Sedan. I knew that this would provoke a CP attack from Liege, Koblenz and Metz (totalling something like 25 factors!), but I also knew that at worst, this would destroy the French army and allow the BEF to contribute to my key goal: an attack on Liege using 2, or even 3, +1 CC cards!
Sure enough, the CP hammered me in Sedan and after taking an extra French loss to remain in place, the BEF unit stood alone. In Liege, Roger also attempted to raise his entrench level to '2', but rolled too high and placed a '-1' marker.
There was nothing for it now, but to launch an attack on Liege at all costs. After some debate, I opted to use 2 '+1' CC cards, instead of 3 as doing so would have dangerously denuded my card hand.
Here is a screenshot as I was about to launch the attack on Liege:
I rolled on the 9-11 column, and got a 3, NOT good enough as I wanted to inflict 7 losses. Now I was wishing I had committed that additional combat card, doh! As we were playing this game via Vassal, I had invited the CP to play its own CC card during the log, but went ahead to do the CP roll. It was a 6. 7 losses. Goodbye most of the BEF, and I felt sure that the CP would absorb the 5 losses and stay put, given that 2 full strength armies were sitting in an entrenched position. End result - little achieved, apart from some CP attrition. I wrote: 'That's screwed it.'
But then, the unexpected took place. Roger played a 'Withdrawal' card, allowing him to restore his reduced Army, but then retreat to Aachen! Woah. I promptly moved my surviving full strength stack from Brussels into Liege.
Pressure now on the CP to seize back the initiative and restore the situation in the West. Roger launched a 3-prong attack: Aachen + Koblenz (5+5+2 factors) vs Liege and Metz to obliterate the surviving remnant of the once proud BEF in Sedan.
First, Sedan was duly obliterated - but caused a German army to flip - nice. No advance.
Then, Liege. Roger decided to attempt a flank attack. The result? A 4. Success. Oh oh.
No CC cards.....and none from me either.
He rolled on the 12-14 column. Hmm...a 1. Lucky for me - 4 losses. But due to being a flank attack, the losses had to be taken before the Allies could roll. French army and French corps duly flipped.
Then my turn, now on the 7 col.
It's a 6!
5 losses. As a result, one Army has to be flipped AND there is only one way to take the remaining losses - to destroy the corps. Koblenz is left vacant!
Roger writes: 'Hm, now the CP is screwed.'
Indeed, it is. All I need to do is advance my stack in Liege in such a way as to isolate the entire German army in the west. PoG is merciless like that. Once your supply is cut off, you can't move or attack. Remain out of supply in the attrition phase and armies are eliminated. Permanently.
The CP called it quits....and once again, Total War had not been reached. Sigh.
This was an amazing sequence of events. I think the play of the Withdrawal card was instrumental in setting the scene for what followed. Then the die rolls completed what amounted to an entirely unexpected and rapid collapse of the CP. Until then, I had thought a long and gradually crushing defeat of the Allies was on the cards.
PoG is overdue for a revision, but remains an awesome game!
Saturday, 25 November 2017
Monday, 25 September 2017
Games on the table - update
Woah, it has been QUITE some time since my last blog entry. One may be forgiven for thinking that I had gone on sabbatical and entered a gaming-free zone, but in fact there has been quite a lot of gaming going on, both 2p, multiplayer and solo.
On the multiplayer front, via the local gaming club, I've played a couple of games of Time of Crisis, the new release from GMT. This is described as a hybrid game, blending - for example - a Euro-inspired deck building component with a wargame setting (in this case the chaotic world of Imperial Rome in the 3rd Century AD. This is a most enjoyable game, well received among club members, and I hope to get back to it soon.
With local gaming buddy Brett, we have also been playing Twilight Struggle, Combat Commander Europe and - now - 1989. Brett is a newcomer to these types of games and is really enjoying them.
On the Vassal front, gaming stalwart Roger and I have recently commenced a game of Paths of Glory. Given that we've developed a stable gaming partnership that has been going strong since 2013, or even earlier, it's amazing that it has taken until now for us to finally get a game of PoG happening.
We're now half way through 1915, with me playing the Central Powers. It's shaping up to be an epic struggle, yet already a major departure from the historical script, with the Germans virtually back to their start line in the West and the Austro-Hungarians being forced back almost to Budapest by a horde of Russian armies!
On the solo front, I have just completed a first run-through of my latest acquisition: FAB: Golan '73. This is the 3rd FAB game that I have owned and I really enjoy the system....which, for the first time, takes us far into the post-WWII world, with the traits of modern warfare, including SAMs, jet air support, electronic warfare and lots of mechanisation. Here is how my solo game ended up:
This is viewed from the Israeli (blue) perspective. The Israelis won the game, pushing the Syrians back to regain almost all of the dual VP areas (those with the yellow stars within orange circles). 1VP is also earned for destroying a unit (block) that has at least 3 dots of combat strength. As per the image below, the Israeli's destroyed 4 such Syrian units, earning them an additional 4 VP. Israel won with a 6VP majority.
I look forward to hopefully playing this one f2f soon.
On the multiplayer front, via the local gaming club, I've played a couple of games of Time of Crisis, the new release from GMT. This is described as a hybrid game, blending - for example - a Euro-inspired deck building component with a wargame setting (in this case the chaotic world of Imperial Rome in the 3rd Century AD. This is a most enjoyable game, well received among club members, and I hope to get back to it soon.
With local gaming buddy Brett, we have also been playing Twilight Struggle, Combat Commander Europe and - now - 1989. Brett is a newcomer to these types of games and is really enjoying them.
On the Vassal front, gaming stalwart Roger and I have recently commenced a game of Paths of Glory. Given that we've developed a stable gaming partnership that has been going strong since 2013, or even earlier, it's amazing that it has taken until now for us to finally get a game of PoG happening.
We're now half way through 1915, with me playing the Central Powers. It's shaping up to be an epic struggle, yet already a major departure from the historical script, with the Germans virtually back to their start line in the West and the Austro-Hungarians being forced back almost to Budapest by a horde of Russian armies!
On the solo front, I have just completed a first run-through of my latest acquisition: FAB: Golan '73. This is the 3rd FAB game that I have owned and I really enjoy the system....which, for the first time, takes us far into the post-WWII world, with the traits of modern warfare, including SAMs, jet air support, electronic warfare and lots of mechanisation. Here is how my solo game ended up:
In retrospect, I didn't push as hard with the Syrians as I should have.....though they were able to occupy Mt Hermon via a para drop, earning 1VP and negatively impacting Israeli artillery ability.
I look forward to hopefully playing this one f2f soon.
Saturday, 10 June 2017
A First Face to Face Game of Coral Sea
A couple of weeks ago, Roger and I enjoyed spending the afternoon giving Coral Sea its first f2f tryout. I played the Japanese.
My initial hand draw was poor on Resource Points (RPs), but rich in reinforcements. In fact, after the first couple of card draws, I also had the 2 Truk fleet cards in my hand. Not bad at all.
It seemed to me that the imperative was to get a force on to Guadalcanal as soon as possible and construct an airbase before the Allies could show up. Within several turns, this was accomplished, with the Japanese also dropping forces on to New Ireland enroute. In retrospect, I think I took too much liberty in landing multiple land units from a single stack/task force...in contravention of the somewhat laboured sea transport rules (a key gripe here....I think those rules need simplifying/clarifying).
Anyway, the game seemed to be unfurling in accordance with the historical narrative....and this was shortly reinforced when a US stack turned up off Guadalcanal and landed several land units, kicking the Japs out of their newly established airfield:
Here you can see the result of our first land-based battle, with the US spending an RP to activate the zone off Guadalcanal (with the shipping marker). While the Japs managed to repel most of the US marines, they themselves were forced to retreat to the western half of the island, leaving a single marines regiment in command of their newly dubbed Henderson Field. Cut off and disorganised, the Japanese troops have been marked out of supply. All battles in this game are conducted by each side placing relevant chits into a cup, then drawing a number of them in accordance with their units' highest tactical value. We then alternate the playing of chits. This can be quite a lengthy process, but it can also be fun. It's extremely difficult in this game to actually eliminate a naval unit, as a single disorganised result forces a selected unit to return to the closest base. Only through delivering a simultaneous disorganised + depleted result to an already depleted naval unit, can it be destroyed. As it happened, the Japanese succeeded in destroying one Allied carrier counter. Not bad going!
Shortly thereafter, the game departed from the historical script. The Japanese returned in force and were able to land sufficient reinforcements on Guadalcanal, to boot the Americans back into the ocean.
At about this time, the Japanese were also able to send two small task forces to the northern coast of New Guinea, landing ground units and shortly thereafter, constructing an airfield south of Lae: enabling airstrikes to reach Port Moresby. The Allies tried to send a ground force across the Owen Stanley Ranges separating the northern coast from Moresby, but soon discovered that moving land forces through the jungle exacts a heavy toll on units (moving from one land zone to another depletes, or flips, each unit). As only a single depleted unit can be re-built for each RP spent, it's an expensive and slow exercise to attempt an overland advance. As per history, sailing around the island transporting land forces soon became the preferred option.
This is how the situation appeared shortly after the Jap landings on the northern coast of New Guinea:
The next thing I sought to do was extend Japanese control out of Guadalcanal to Esperitu Santu, and to complete the conquest of island between Rabaul and Guadalcanal. Soon after landing a small force on Santu though, another Allied taskforce turned up to try and seize the island back. A battle ensued and the Japanese naval and ground forces narrowly persevered, sending the Allies scurrying back to New Caledonia. As soon as feasible though, they were back.....and in greater force. The short Japanese dominion of Esperitu Santu came to swift end.
The final operation of the game centred on the Allies sending a naval task force with troop transports around the eastern coast of New Guinea, intent on landing at Buna and Lae to expel the Japs from the island. Battle chaos soon ensued:
Under intense Allied pressure, the Japs were able to deliver additional land units to the coast north of Lae, just in time to counter-attack and drive Allied ground troops back on to their landing ships. Pretty fiddling dealing with these massive stacks of units and their status counters!
Not long after this, the game came to a close as I drew the final card from the Japanese deck. The final score, based on map objectives and losses: a Japanese victory, 30 points to 19.
An enjoyable game, though some of the ambiguities in the exclusive rules in particular, can lead to some interpretation headaches. We're going to play this again and be more rigorous re the sea transport rules....which will no doubt force the Japanese to be even more careful in their spend of each valuable resource point.
My impression is that this is a pretty good game and deserves to be re-published, overhauling some of the rules and modifying the game engine in a way that would strengthen the fog of war potential so that the uncertainty surrounding each thrust and counter-thrust could be further enhanced. I salute the game's Spanish designers!
There really should be more games done on the Battle of the Coral Sea......and I feel that gaming companies missed an opportunity by not releasing a game in time for the recent 75th anniversary of the Battle.
My initial hand draw was poor on Resource Points (RPs), but rich in reinforcements. In fact, after the first couple of card draws, I also had the 2 Truk fleet cards in my hand. Not bad at all.
It seemed to me that the imperative was to get a force on to Guadalcanal as soon as possible and construct an airbase before the Allies could show up. Within several turns, this was accomplished, with the Japanese also dropping forces on to New Ireland enroute. In retrospect, I think I took too much liberty in landing multiple land units from a single stack/task force...in contravention of the somewhat laboured sea transport rules (a key gripe here....I think those rules need simplifying/clarifying).
Anyway, the game seemed to be unfurling in accordance with the historical narrative....and this was shortly reinforced when a US stack turned up off Guadalcanal and landed several land units, kicking the Japs out of their newly established airfield:
Here you can see the result of our first land-based battle, with the US spending an RP to activate the zone off Guadalcanal (with the shipping marker). While the Japs managed to repel most of the US marines, they themselves were forced to retreat to the western half of the island, leaving a single marines regiment in command of their newly dubbed Henderson Field. Cut off and disorganised, the Japanese troops have been marked out of supply. All battles in this game are conducted by each side placing relevant chits into a cup, then drawing a number of them in accordance with their units' highest tactical value. We then alternate the playing of chits. This can be quite a lengthy process, but it can also be fun. It's extremely difficult in this game to actually eliminate a naval unit, as a single disorganised result forces a selected unit to return to the closest base. Only through delivering a simultaneous disorganised + depleted result to an already depleted naval unit, can it be destroyed. As it happened, the Japanese succeeded in destroying one Allied carrier counter. Not bad going!
Shortly thereafter, the game departed from the historical script. The Japanese returned in force and were able to land sufficient reinforcements on Guadalcanal, to boot the Americans back into the ocean.
At about this time, the Japanese were also able to send two small task forces to the northern coast of New Guinea, landing ground units and shortly thereafter, constructing an airfield south of Lae: enabling airstrikes to reach Port Moresby. The Allies tried to send a ground force across the Owen Stanley Ranges separating the northern coast from Moresby, but soon discovered that moving land forces through the jungle exacts a heavy toll on units (moving from one land zone to another depletes, or flips, each unit). As only a single depleted unit can be re-built for each RP spent, it's an expensive and slow exercise to attempt an overland advance. As per history, sailing around the island transporting land forces soon became the preferred option.
This is how the situation appeared shortly after the Jap landings on the northern coast of New Guinea:
The next thing I sought to do was extend Japanese control out of Guadalcanal to Esperitu Santu, and to complete the conquest of island between Rabaul and Guadalcanal. Soon after landing a small force on Santu though, another Allied taskforce turned up to try and seize the island back. A battle ensued and the Japanese naval and ground forces narrowly persevered, sending the Allies scurrying back to New Caledonia. As soon as feasible though, they were back.....and in greater force. The short Japanese dominion of Esperitu Santu came to swift end.
The final operation of the game centred on the Allies sending a naval task force with troop transports around the eastern coast of New Guinea, intent on landing at Buna and Lae to expel the Japs from the island. Battle chaos soon ensued:
Under intense Allied pressure, the Japs were able to deliver additional land units to the coast north of Lae, just in time to counter-attack and drive Allied ground troops back on to their landing ships. Pretty fiddling dealing with these massive stacks of units and their status counters!
Not long after this, the game came to a close as I drew the final card from the Japanese deck. The final score, based on map objectives and losses: a Japanese victory, 30 points to 19.
An enjoyable game, though some of the ambiguities in the exclusive rules in particular, can lead to some interpretation headaches. We're going to play this again and be more rigorous re the sea transport rules....which will no doubt force the Japanese to be even more careful in their spend of each valuable resource point.
My impression is that this is a pretty good game and deserves to be re-published, overhauling some of the rules and modifying the game engine in a way that would strengthen the fog of war potential so that the uncertainty surrounding each thrust and counter-thrust could be further enhanced. I salute the game's Spanish designers!
There really should be more games done on the Battle of the Coral Sea......and I feel that gaming companies missed an opportunity by not releasing a game in time for the recent 75th anniversary of the Battle.
Sunday, 14 May 2017
On the Table - Coral Sea
I've had this game for at least 5 years, but never got around to trying it out. However, noting that this month is the 75 anniversary of the Battle of the Coral Sea, NOW is the perfect time to dust it off and try this quite highly rated (7.1, BGG) game out for myself. The game was produced back in 2010 by Spanish publisher Bellica Third Generation.
The game looks great and has some innovative mechanics, including simultaneous reveal of chits to determine if a player decides to conduct a map operation or perform some kind of card play. Chits are also drawn during land or naval combat, with they type of chits available to each side dependent upon the type of assets (eg air, naval) committed to the battle.
Here a shot of the game, set up and ready to play.......
....and a closer shot of Japanese forces and resources that start at Rabaul:
More on this one later..........I'm going to play it f2f with local gaming buddy Roger, then follow up with another game using the Vassal module.
The game looks great and has some innovative mechanics, including simultaneous reveal of chits to determine if a player decides to conduct a map operation or perform some kind of card play. Chits are also drawn during land or naval combat, with they type of chits available to each side dependent upon the type of assets (eg air, naval) committed to the battle.
Here a shot of the game, set up and ready to play.......
....and a closer shot of Japanese forces and resources that start at Rabaul:
More on this one later..........I'm going to play it f2f with local gaming buddy Roger, then follow up with another game using the Vassal module.
Saturday, 6 May 2017
On the Table......Fighting Formations
A number of weeks have transpired since my last entry. In that time, a few games have hit my table. Most notably, has been several scenarios of Chad Jensen's WWII tactical game, Fighting Formations.
This game focuses on the experience of the Gross Deutschland division on the Eastern Front.
Over a number of weeks, local gaming buddy Jono and I played the tutorial, Scenario 1 and Scenario 4. Here's a screenshot taken during Scenario 4, in which a German force comprising Pioneers and StugIIIs attempts to seize key objectives along a fortified Soviet defensive line:
As you can see from the above picture, the Soviets have a pretty formidable line, comprising pillboxes, entrenchments, mines and wire. Some remain unrevealed, represented by sighting markers. If the Germans enter their actual or adjacent hex, or score a hit on the hex, then these markers are revealed...possibly more of the above defences or a false sighting. The red rimmed hexagons show the location of key objective hexes.
The situation in the above picture is that German armour platoons are testing the Soviet defensive emplacements. They had been careful to reveal sighting markers from at least a 2-hex distance in case they were mines (which, on being revealed, can be placed in an adjacent hex - simulating a unit blundering into a minefield). Meanwhile, a Soviet fighter bomber has dealt some damage to pioneers working their way up the slope before the defensive line.
You can see a round Soviet command marker in the pillbox hex. As this is currently showing its '1' setting, it can activate units within its command radius (2 for the Sovs) for the cost of 1 initiative point per unit.
I'm not going to write a review of this game, but to make some general remarks about it....and why Jono and I decided, after playing 3 games, to put it aside.
Being fans of Combat Commander, we were well primed to enjoy this game - and indeed, were attracted by the opportunity to play a system including tanks and other types of vehicles. We were also attracted by the matrix system in the game, allowing cubes to be selected for various points of initiative cost, to issue different types of orders. One of my bug bears with Combat Commander is the degree to which you depend on the cards in your hand for even issuing simple orders such as Fire and Move. This can be very frustrating. So, the matrix system was a winner.
The sighting marker system is also great in Fighting Formations. Some can reveal hidden units (kept off-board) and their use give recce units far more importance. We really liked the use of chit pulls for dealing out damage as well (such as the orange and red chits in the above image). Thumbs up too for the system of command activation and the use of return fire and rate of fire rules. The use of asset cards is great too.
All of that was good and we liked the look of the game. Sadly though, what soured the game for us was a feeling that the system got in the way of game play. The biggest gripe was the degree of time required to handle all of the mechanics associated with multi-unit combat. It's very time consuming and you have to constantly be referencing the modes of fire and various drms affecting the choice of dice to be used for offensive and defensive fire. We had hoped for a more fluid gaming experience, but even into our 3rd game - and being more familiar with the rule-set and mechanics - the grind of working our way through various routines robbed us somewhat of actually enjoying the experience.
Even these larger than normal hexes can become very messy too, with lots of counters crammed or piled on to them. Some of the counters, esp vehicles, should have been smaller.
As a result, game play is usually quite slow and - in the heat of combat - can become tedious.
So, our hunt for a fun yet reasonable tactical simulation of WWII combined arms combat continues. The Band of Brothers series from Worthington Game is probably going to be our next try out.
This game focuses on the experience of the Gross Deutschland division on the Eastern Front.
Over a number of weeks, local gaming buddy Jono and I played the tutorial, Scenario 1 and Scenario 4. Here's a screenshot taken during Scenario 4, in which a German force comprising Pioneers and StugIIIs attempts to seize key objectives along a fortified Soviet defensive line:
As you can see from the above picture, the Soviets have a pretty formidable line, comprising pillboxes, entrenchments, mines and wire. Some remain unrevealed, represented by sighting markers. If the Germans enter their actual or adjacent hex, or score a hit on the hex, then these markers are revealed...possibly more of the above defences or a false sighting. The red rimmed hexagons show the location of key objective hexes.
The situation in the above picture is that German armour platoons are testing the Soviet defensive emplacements. They had been careful to reveal sighting markers from at least a 2-hex distance in case they were mines (which, on being revealed, can be placed in an adjacent hex - simulating a unit blundering into a minefield). Meanwhile, a Soviet fighter bomber has dealt some damage to pioneers working their way up the slope before the defensive line.
You can see a round Soviet command marker in the pillbox hex. As this is currently showing its '1' setting, it can activate units within its command radius (2 for the Sovs) for the cost of 1 initiative point per unit.
I'm not going to write a review of this game, but to make some general remarks about it....and why Jono and I decided, after playing 3 games, to put it aside.
Being fans of Combat Commander, we were well primed to enjoy this game - and indeed, were attracted by the opportunity to play a system including tanks and other types of vehicles. We were also attracted by the matrix system in the game, allowing cubes to be selected for various points of initiative cost, to issue different types of orders. One of my bug bears with Combat Commander is the degree to which you depend on the cards in your hand for even issuing simple orders such as Fire and Move. This can be very frustrating. So, the matrix system was a winner.
The sighting marker system is also great in Fighting Formations. Some can reveal hidden units (kept off-board) and their use give recce units far more importance. We really liked the use of chit pulls for dealing out damage as well (such as the orange and red chits in the above image). Thumbs up too for the system of command activation and the use of return fire and rate of fire rules. The use of asset cards is great too.
All of that was good and we liked the look of the game. Sadly though, what soured the game for us was a feeling that the system got in the way of game play. The biggest gripe was the degree of time required to handle all of the mechanics associated with multi-unit combat. It's very time consuming and you have to constantly be referencing the modes of fire and various drms affecting the choice of dice to be used for offensive and defensive fire. We had hoped for a more fluid gaming experience, but even into our 3rd game - and being more familiar with the rule-set and mechanics - the grind of working our way through various routines robbed us somewhat of actually enjoying the experience.
Even these larger than normal hexes can become very messy too, with lots of counters crammed or piled on to them. Some of the counters, esp vehicles, should have been smaller.
As a result, game play is usually quite slow and - in the heat of combat - can become tedious.
So, our hunt for a fun yet reasonable tactical simulation of WWII combined arms combat continues. The Band of Brothers series from Worthington Game is probably going to be our next try out.
Sunday, 26 March 2017
Second Bull Run - the Complete Battle - Status Report #3 - FINAL
At the conclusion to my previous update on this epic game, it was 1:30pm August 29. Union forces were pushing up from the south, threatening the Confederate right flank, and to the north, fighting was at a high tempo as the Union attempted to penetrate the Rebel defensive line south-west of Sudley Church.
So what happened?
The outcome is that both sides had exhausted themselves by the evening of the 29th. The Union came close to punching a hole along the unfinished railway line, but worn down by musket volleys and artillery fire at close range, they gradually had to give up their hard won ground and pull back to lick their wounds. The Rebs had largely been reduced to a rag-tag line of defenders by this point, with the exception of the magnificent Forno brigade and its supporting artillery, which proved decisive in unravelling Union ambitions.
To the south, Longstreet's L-Wing had pushed eastward in its goal of seizing Groveton and destroying the remnants of Sigel's Corps, but the aggressive arrival of Porter's 5th Corps, pushing on Stuart's Hill had blunted Longstreet's ambitions, forcing him to commit Jones' Division to delay Porter and - as the situation worsened - bleed off more brigades from the Groveton attack. Superior Rebel command initiative made this flexibility possible.
With both sides grinding to a halt, Roger and I agreed upon a cessation of the battle at 6pm. Here is a snapshot of the outcome:
Jackson's divisions were able to restore the situation along the railroad. In addition, one of his divisions, supported by artillery, staged a belated - and admittedly feeble - attempt to join in the attack on Groveton. Both sides had resorted to close combat around Groveton, with first the Union, then the CSA, experiencing some success in routing enemy brigades. To the west, Porter's troops had been able to push the ragged Rebel line back to north of the Warrenton Turnpike, but this high tide proved short-lived. Worn out by their exertions and stoppage rolls (experienced elsewhere on the battlefield at this time), they had little choice but to pull back.
In this game, we opted for the rule improving Pope's performance rating....and in this battle, the Union experienced quite a lot of success in mobilising the arrival of its forces and mounting timely attacks.
Losses were heavy on both sides: 122 (CSA), 152 (USA).
Further Rebel reinforcements were expected to arrive that evening, but somewhat fatigued ourselves, Roger and I opted to discontinue the battle and call it a day.
The end result? Although the CSA had succeeded in maintaining control of all of its VP locations, it was unable to sweep eastwards to seize the Stone Bridge and New Market. After totalling up terrain points and awarding each other points resulting from our losses, the outcome was +2 VP to the CSA, resulting in a DRAW. Historically, the battle was a minor Rebel victory. Leader losses did not seem to count towards VP in this scenario. Union leader losses were high:
Reynolds (USA) (!)
Hooker (USA) (!)
Reno (USA)
Repl ldr - 9 Corps (USA)
Heintzelman - 3 Corps (USA) wounded
Sykes (USA) wounded
For the CSA:
Talliaferro (CSA)
A.P. Hill (CSA) (!)
Wilcox (CSA) killed
Major ramifications for Gettysburg here.......
It was a great experience to set out to tackle an entire battle using the CWBS system. I continue to really enjoy the command system and the uncertainties it presents. The combat system is also superb, giving one the sense of being locked in a struggle, one in which you have a small window of opportunity for 'glory' until your own forces are themselves ground down.
On the downside, the degree of book-keeping demanded by the system began to fatigue both of us, so we look forward to trying The Gamers' streamlined version of this system some time in the future. Thanks again to Roger for participating in this major venture - salute!
Friday, 24 February 2017
On the Table....
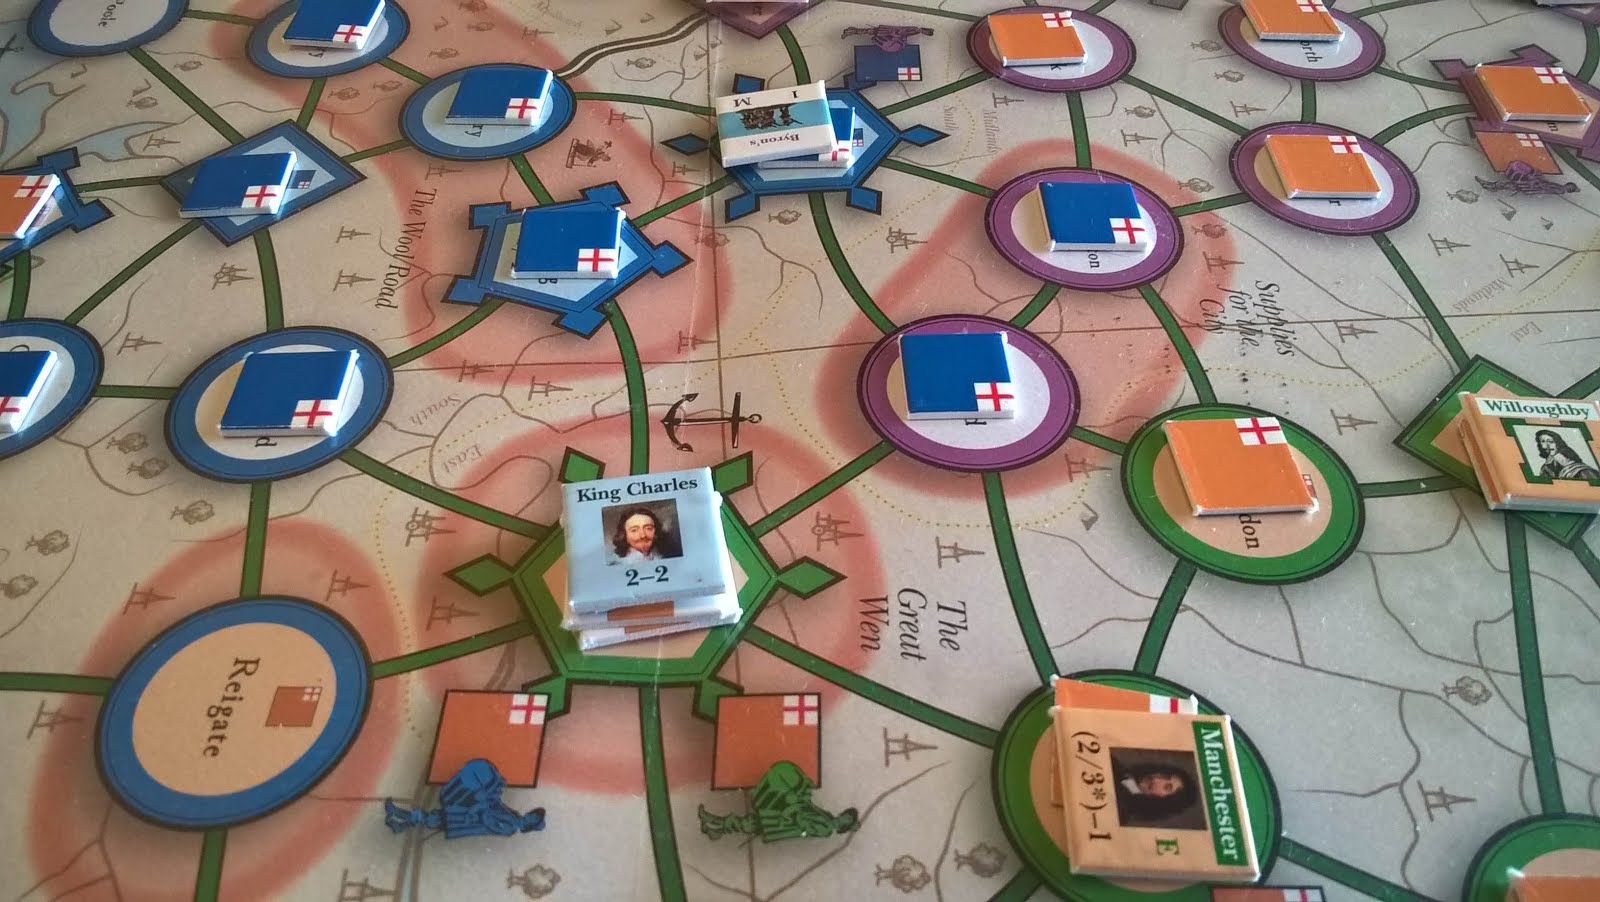
On the gaming table currently is Unhappy King Charles! I first purchased this game back in 2011 and enjoyed my first game over Vassal, but had never managed to get a proper game to the table....until now!
UKC is a card-driven, point-to-point game focused on the English Civil War of the 1640s. In terms of the games that I am familiar with, UKC's mechanics have quite a bit in common with Washington's War. It's a step up in complexity, but getting up to speed with gameplay is mighty rewarding. I really do admire this game and enjoy the 'cat and mouse' thrust and parry nature of it, together with planning strategic plays according to a hand of cards. As befits a civil war too, there is no single front line, with tugs of war to wrest control going on in virtually each point of the compass.
Local gaming buddy Brett - a relative newcomer to these types of games - is playing Parliament, while I am the Royalists. Last night we completed 1643, and it was a mightily dramatic turn. My royalists had an extra card in reserve - known as an 'Ace in the Hole'. In addition, they were able to play an event that awarded another card from the deck. IN ADDITION, the aggressive Parliamentarians used two combat cards during battles. IN ADDITION, the King's forces won a major battle, allowing a victory card to be drawn as spoils.
As a result, the Royalists were delivered with the rare opportunity of playing 4 cards in a row after Parliament's hand had been exhausted. Not to miss this golden opportunity, Charles succeeded in ending Essex's siege of Oxford and sending him packing, his forces choosing to disperse. More than that, Royalist forces were able to mask London (preventing it from acting as a source for tracing supply) and isolate the entire SE and E of England, resulting in at least half a dozen control markers being removed in those regions.
When it came to calculating if a sudden victory had been triggered, Parliament was just able to prevent ultimate defeat by a margin of 2-3 control markers.
This may prove to be Charles' single greatest moment to restore the monarchy in England, but we will see....certainly it will become more difficult, if history is a guide.
A most excellent game - hats off to its creator, Charles Vasey Esq!
Long Live the King!
![]() |
| Charles' army masks London....Parliament beware! Happy King Charles? |
Saturday, 28 January 2017
A Highly Anticipated Game for 2017
Over the past few months, I haven't had a good track record in converting anticipation into physical copies. Stonewall's Sword and FAB: Golan still elude me, while others are still yet to be readied for shipping.
This doesn't stop the pangs of anticipation though, and the latest entry on my wish list is:
For me, this sounds like it has the combination of qualities that will boost its chances of being played: reasonably low complexity, do-able in a single afternoon or evening, aesthetically attractive design and components....and of course, it's set in the Roman Empire. What's not to like?
Cards look great:
...as does the map:
Commentary from playtesters has been very positive. Time of Crisis is currently slated to be published by GMT in April this year. I think I'll have to take the P500 plunge on this one.
This doesn't stop the pangs of anticipation though, and the latest entry on my wish list is:
For me, this sounds like it has the combination of qualities that will boost its chances of being played: reasonably low complexity, do-able in a single afternoon or evening, aesthetically attractive design and components....and of course, it's set in the Roman Empire. What's not to like?
Cards look great:
...as does the map:
Commentary from playtesters has been very positive. Time of Crisis is currently slated to be published by GMT in April this year. I think I'll have to take the P500 plunge on this one.
Friday, 6 January 2017
Crackerjack Combat Commander session
I recently hooked up with local gaming buddy Steve for a game of Combat Commander. For our face to face session, I chose scenario 80 from Battle Pack 5: Fall of the West. Entitled Bitter Isthmus, this one has French and German recon forces clash head on near Montherme, France in May 1940.
As the Germans, I set up first - threatening to quickly seize the middle ground. But the French decided to be assertive and use their ability to move first in the scenario to their advantage, getting the jump on the Germans and seizing the strategic centre point themselves. The Germans were soon on their knees, and I thought that this would be a quick scenario!
Instead, what followed for the next 3 hours saw the pendulum of battle swing back and forth repeatedly. An interesting special rule meant that each time a Time advance was triggered, we would both roll to see who would become defender or attacker (with associated changes in card hand size). This resulted in the Germans becoming defender for much of the scenario, earning a VP each time the turn number was advanced.
The picture shows the status in the centre as the game went down to the wire. The VP result at this time, was only +1 to the Germans. The results of Dig In actions played by both sides during the game can be also clearly seen.
In the course of the game, the French succeeded in eliminating several German squads, a HMG & team, and two leaders, especially through the use of a well co-ordinated Fire and Advance combination, assisted with two 'Ambush' actions (ouch!). Yet the Germans had some success too, knocking out a couple of French squads and a leader, and seizing the central objective (#5).
The Germans were only two losses away from surrender, while the Turn marker had already exceeded the Sudden Death marker once. After Steve's HMG team and squad under Lt Serrault had almost wiped out the German defenders in 'Objective 4' hex J4 (resulting in a single broken German team hanging on), Steve lined up to fire his Chasseur squad from hex I6, intent on wiping out the broken German team. This would leave him free to then seize the objective shortly thereafter.
Just as he made his fire roll, he drew a 'Time' card. Rather than use his Initiative card, to force a re-roll, he decided to stick it out and risk a Sudden Death roll. He failed the roll and passed the Initiative card to me....then succeeded in his subsequent roll. I passed the card back to him to force a re-roll. I think we did this a couple of times, but ultimately the game came to a sudden end, before the French could seize Objective 4....and claim the game. Objective 4 was worth 1VP as an open objective, but once the game ended, I revealed the German secret objective...awarding 4 more VP to Objective 4!
The result: a narrow German win.....and a dramatic end to a fine evening of CC gaming!!
Friday, 9 December 2016
Second Bull Run - the Complete Battle - Status Report #2
I'm striking while the iron is hot today, quickly following up from my last post with a Battle of 2nd Bull Run (Second Battle of Manassas) update.
The previous update presented a snapshot of how the situation looked at Noon on the 29th of August, 1862. Along the unfinished railway line, Hill's division was doing its utmost to fend off a concerted attack by two Federal corps. Meanwhile, to the southeast, Lee's L-Wing has arrived and deployed along Pageland Lane to await further orders. Further south, a Federal column - Porter's 5th Corps - is winding its way in a north-westerly direction....possibly towards Gainesville.
An hour and a half later, the battle is in high tempo...and so is the carnage. Along Hill's defensive line, the two sides have been slugging it out, inflicting heavy casualties. It's become a brutal and desperate gamble to see who cracks first. A number of brigades have been whittled down to rag-tag shadows of their former glory. Fields' brigade has been destroyed, survivors streaming to the rear.
The butcher's bill is reflected in the toll on senior commanders too. Since noon, AP Hill, Reynolds, Hooker and Reno have all been killed or wounded.
Here is the situation along the northern stretch of the unfinished railroad line, at the commencement of the Confederate 1:30pm turn:
Some of the Union brigades at the southern end of the assault have pulled back after a failed (or one may say successful) stoppage roll. Just to the north, Branch's Rebel brigade is about to collapse, offering the Union a tantalising opportunity to breakthrough...IF they can still bring sufficient force to do so. Aware of this eventuality, Lee had issued Evan's Brigade with a divisional goal to support Hill's (RIP) beleaguered position. Evans' fresh troops may be sorely needed.
To the southwest, things are rapidly hotting up. After a minimum of delay, Lee was fortunate to have his orders quickly accepted by Longstreet. Most of his corps is now pushing eastward, threatening Sigel's already depleted troops with the prospect of a knockout blow. But Lee has worries of his own. Porter's Corps is even now approaching Jones's screening troops deployed around Stuart's Hill. What will be the Federals' next move?
The battle is now at a critical juncture. To find out who will prevail, stay tuned for the next update.
The previous update presented a snapshot of how the situation looked at Noon on the 29th of August, 1862. Along the unfinished railway line, Hill's division was doing its utmost to fend off a concerted attack by two Federal corps. Meanwhile, to the southeast, Lee's L-Wing has arrived and deployed along Pageland Lane to await further orders. Further south, a Federal column - Porter's 5th Corps - is winding its way in a north-westerly direction....possibly towards Gainesville.
An hour and a half later, the battle is in high tempo...and so is the carnage. Along Hill's defensive line, the two sides have been slugging it out, inflicting heavy casualties. It's become a brutal and desperate gamble to see who cracks first. A number of brigades have been whittled down to rag-tag shadows of their former glory. Fields' brigade has been destroyed, survivors streaming to the rear.
The butcher's bill is reflected in the toll on senior commanders too. Since noon, AP Hill, Reynolds, Hooker and Reno have all been killed or wounded.
Here is the situation along the northern stretch of the unfinished railroad line, at the commencement of the Confederate 1:30pm turn:
Some of the Union brigades at the southern end of the assault have pulled back after a failed (or one may say successful) stoppage roll. Just to the north, Branch's Rebel brigade is about to collapse, offering the Union a tantalising opportunity to breakthrough...IF they can still bring sufficient force to do so. Aware of this eventuality, Lee had issued Evan's Brigade with a divisional goal to support Hill's (RIP) beleaguered position. Evans' fresh troops may be sorely needed.
To the southwest, things are rapidly hotting up. After a minimum of delay, Lee was fortunate to have his orders quickly accepted by Longstreet. Most of his corps is now pushing eastward, threatening Sigel's already depleted troops with the prospect of a knockout blow. But Lee has worries of his own. Porter's Corps is even now approaching Jones's screening troops deployed around Stuart's Hill. What will be the Federals' next move?
The battle is now at a critical juncture. To find out who will prevail, stay tuned for the next update.
Aussie Gaming Gripes - and Almeida & Bussaco 1810 from Hexasim Games
Back in August, I listed my top most highly anticipated games of the day. Now, 4 months later, I am still yet to own a single one of them. What happened you may ask? Well, some of these games have simply not yet been published - and are expected in 2017. However, FAB Golan and Stonewall's Sword have been out for some months now.
What has prevented me from pulling the 'buy' trigger here in Australia is either the games cannot be purchased from any retailer here, or - if they can - the retail price is 150-200% on what gamers in the US enjoy.
Shipping these games internationally has become hideously expensive. Not too long ago, Milsims here in Australia was offering these games at a very attractive price, but the wheels sadly came off of that operation and a number of gamers - including myself - got burnt, with Milsims neither honouring orders nor making refunds. The ratbag running that operation took the money and ran.
I must hasten to add that Milsims has now been resurrected under entirely new ownership. It's too early to tell yet if we gamers will once more enjoy the kind of prices and range of titles of yesteryear. Somehow, I doubt it, as such prices probably contributed to the downfall of a company that had, for so long, been a key part of the gaming retail landscape here in Australia. As a teen in the 70s - when the dinosaurs still walked the Earth - I well remember the excitement of receiving their latest catalogues in the post.
Well, enough of these gripes. At least this new climate of austerity has encouraged me to spend more time with the games that I own - including some that I (ahem) have owned for some time, but never played. More on that in future instalments...as they hit the table. Right now, I am doing a solo learning game from Almeida & Bussaco 1810 - one of the many titles from Frederic Bey's Jours de Gloire Series.
This is the game's cover, provided by Christophe Gentil-Perret on the game's BGG page:
I saw this title for sale on E-Bay and decided to pick it up after noting just how highly rated these Bey game are. After playing a couple of solo games, my strong impression is that their reputation is well deserved. These games are generally at battalion-scale - here's a snapshot from that battle - again from the BGG site - provided by Remi Carton:
You can see the fortress of Almeida in the SW corner of the map, bristling with fixed Portugese batteries. For those of you - like me - who are fans of the Richard Sharpe novels from Bernard Cornwell, Almeida should be well known to you....and you can also spy the 95th rifles in the bottom centre of the above image.
I'm not going to go into detail now about this game system, but will reserve that until such time as I have a couple of 2p games under my belt. However, in my solo games, I've been enjoying the chit pull and order allocation system. With the latter, you can see the 'QG' markers with their horseman silhouettes in the above picture. When specific formations are activated by having their command markers drawn from a cup, their associated order (horseman) markers are turned over, to reveal if they have been allocated orders or not. This order status will have implications for a range of actions, including movement and combat. In the picture, you can see a revealed marker immediately to the left of the fortress, indicating that the British formation has not been allocated orders this turn. A player does have the option of trying for a die roll to see if a formation can receive orders. If this fails, then all they can do is rally.
In contrast to the situation in the above picture (Turn 8), in both of my solo games, the British/Portugese were smashed by overwhelming French attacks. I need to think more about how to put up a more effective defence/delay operation.
I look forward to a face to face game of this in the near future.
Enough of Napoleonics. You may be asking what has happened to the epic Battle of Second Bull Run? Well, after a couple of weeks' hiatus while Roger was traveling, the battle has resumed....with fury. More on this soon.
Friday, 11 November 2016
Second Bull Run - the Complete Battle - Status Report #1
August 29, 1862.......
Roger and I have decided to play the entire battle of 2nd Bull Run. We're playing August Fury II, from the Three Battles of Manassas game, which is part of the Civil War Brigade Series (CWBS) from The Gamers.
It's NOON on the 2nd day of the battle. Here is the situation (Each number corresponds to a number on the map):
1. About mid-morning, Lee and Longstreet arrived with the entire L Wing, intent on joining up with Jackson and his beleaguered J Wing. By noon, they have deployed along Pageland Lane. They await further orders from Lee.
East of their position, Franz Sigel's 1Va Corps has gone on the defensive, after pulling back from an earlier attack that had bent back Jackson's right flank and forced Stuart into an emergency retreat.
Jackon's boys on his right are grateful for the rest. Prior to Sigel's attack, they had been on the attack themselves late on the previous day, near Brawner's Farm - forcing back Hatch's 3Va to south of the Turnpike. Badly cut up, the 3rd Va was withdrawn during the night.
Here's a close up of the situation at '1':
2: Earlier in the day, the pressure had been on Jackson's right wing, but now the left under Hill is on the receiving end, with the successful arrival and activation of the Union 3rd Va, 3rd and 9th Corps. Pope is also on the field (Playing the Union, Roger opted to use the optional rule increasing Pope's command rating from 0 to 1).
Both sides have been dishing out hell now for a couple of hours. The Rebel position along the unfinished railroad is hard pressed, but holding so far, despite the destruction of Field's Brigade. The Confederates have seen off Reynold's bruised 3rd Va - Reynolds himself wounded and Seymour's brigade has routed. The Union has just renewed the attack, with troops under the command of Kearny, Stevens, and Hooker - whose brigade under Grover has been whipped up by Rebel fire into bloodlust (BL).
Here's a close-up of the situation at '2':
As the fighting intensifies, to the south, another Union formation arrives: Porter's 5th Corps!
Rebel scouts report that it is marching north-west along the Manassas-Gainsville Road.
An update will follow as our own rendition of this epic battle plays out........
Friday, 7 October 2016
So What's A Great Single Volume History to Complement Twilight Struggle?
This month I had the pleasure of purchasing and reading The Cold War by a man who has been called the 'dean of Cold War historians', John Lewis Gaddis.
I have the paperback - cheap as - version that comes in at only 266 pages. Associated with that is the only gripe I have with the book - the font size is small enough to be a tad annoying.
If, like me, you are a fan of Twilight Struggle - and are looking for an insightful single volume overview of the Cold War as a kind of companion to the game - then I can highly recommend this title. What this book is not, is a comprehensive A-Z guide to all of the events cited in the game. Rather, the author elegantly steps through the various stages of the Cold War in chronological fashion, ably providing expert analysis and evaluation of key events, personalities and themes that came to define the fascinating course of the Cold War. It's not a dry read either.....Gaddis writes with aplomb, wit and penetrating insight...all contributing to an enjoyable read.
Reading The Cold War made it clear to me that while Twilight Struggle may be a great duelling-style game, it's also incredibly simplistic in its rendition of the conflict and cannot possibly capture many of the significant philosophies, personalities and the ebb and flow of social and economic currents that played a crucial role in how the history played out. China and Mao for example are such huge players in Cold War history, but are only given tangential treatment in the game. And what about concepts such as Mutually Assured Destruction that are just so central and unique to the story of the Cold War?
Perhaps future games on this subject will seek to build a more nuanced portrait of this long and titanic struggle. I look forward to that. In the meantime, I'll continue to enjoy playing Twilight Struggle!
If, like me, you are a fan of Twilight Struggle - and are looking for an insightful single volume overview of the Cold War as a kind of companion to the game - then I can highly recommend this title. What this book is not, is a comprehensive A-Z guide to all of the events cited in the game. Rather, the author elegantly steps through the various stages of the Cold War in chronological fashion, ably providing expert analysis and evaluation of key events, personalities and themes that came to define the fascinating course of the Cold War. It's not a dry read either.....Gaddis writes with aplomb, wit and penetrating insight...all contributing to an enjoyable read.
![]() |
| Two fans of Twilight Struggle ham it up to celebrate their 100th game! (Photo by Fred Shugars) |
Perhaps future games on this subject will seek to build a more nuanced portrait of this long and titanic struggle. I look forward to that. In the meantime, I'll continue to enjoy playing Twilight Struggle!
August Fury - 2nd Battle of Bull Run - Second Day - Conclusion
As it turns out, rather than a 'Part Two' report of this scenario, it's more appropriate to term it a 'postscript'. In our version of history, Longstreet proved to be far less reluctant to take the fight to the enemy, sweeping eastward - eventually with most of his corps - to engage Brig. Gen. John Reynold's depleted division of Pennsylvania reserves at New Market.
By 14:30, Reynold's division had been almost totally wiped out - with only the last remaining batteries of divisional artillery escaping capture. Reynolds himself fell into Rebel hands.....sparing him from his fateful meeting with destiny at Gettysburg! A Union relief column from the south - under Hatch - could not arrive in time to prevent the rebels from capturing New Market.
This is how it looked:
Immediately to the north, Jackson's divisions (Ewell, Taliaferro) pushed eastward, forcing back Franz Segel's beleagured 1st Va Corps. The force of the Rebel attack routed 2 brigades and their supporting artillery, panicked Federal troops swarming over their supply train as they fled. By 2:30, the Confederates had seized Chinn Ridge, before their orders directed them to advance towards New Market.
Further north, Pope attempted to break through the line of A.P. Hill's defenders still manning the unfinished railroad. Unaware of the situation elsewhere, he still thinks he's on the verge of a major victory and pursuing a defeated enemy! Kearney's division and Reno's 9 Corps advanced to try and force their way through near Sudley Church, but dug in, the Rebels proved a nut too tough to crack, driving off the blueshirts and wounding divisional commander Isaac Stevens in the process.
The situation at 14:30:
With the Union army scattered across the battlefield, unable to contend with the rapidly evolving situation, we elected to discontinue the game.
The post mortem on this scenario is that the Union seems doomed for defeat thanks to the initial orders issued by Pope. These orders largely consign various Union formations to piece-meal, un-coordinated attacks - often against Rebel defenders holding superior ground - that rob the Union of any real chance to deliver a telling blow.
As mentioned, Pope's 0 leadership rating - and delay in arriving on the scene - makes it very difficult for the Union player to successfully change the above situation to avoid disaster. Much also rests on how quickly the two sides can bring in their reinforcements. We opted for the variable arrival rules, requiring a 10+ to be rolled for each formation. Unfortunately, the dice did not go in the Union's favour. In contrast, the Confederates were able to bring up Longstreet's corps pretty much on schedule. With Lee and Jackson's high command values, the Confederates proved much more effective at responding to the battlefield situation and seizing opportunities.
We certainly enjoyed playing this, especially given the uncertainty surrounding the arrival of formations and the potential that exists for manoeuvre.
Coming out of this, Roger and I have decided to try our hand at the full battle of 2nd Bull Run! The hope is that the much longer time-frame will allow the Union commander more opportunity to formulate and prosecute a cohesive offensive against those vile Rebels!
By 14:30, Reynold's division had been almost totally wiped out - with only the last remaining batteries of divisional artillery escaping capture. Reynolds himself fell into Rebel hands.....sparing him from his fateful meeting with destiny at Gettysburg! A Union relief column from the south - under Hatch - could not arrive in time to prevent the rebels from capturing New Market.
This is how it looked:
Immediately to the north, Jackson's divisions (Ewell, Taliaferro) pushed eastward, forcing back Franz Segel's beleagured 1st Va Corps. The force of the Rebel attack routed 2 brigades and their supporting artillery, panicked Federal troops swarming over their supply train as they fled. By 2:30, the Confederates had seized Chinn Ridge, before their orders directed them to advance towards New Market.
Further north, Pope attempted to break through the line of A.P. Hill's defenders still manning the unfinished railroad. Unaware of the situation elsewhere, he still thinks he's on the verge of a major victory and pursuing a defeated enemy! Kearney's division and Reno's 9 Corps advanced to try and force their way through near Sudley Church, but dug in, the Rebels proved a nut too tough to crack, driving off the blueshirts and wounding divisional commander Isaac Stevens in the process.
The situation at 14:30:
With the Union army scattered across the battlefield, unable to contend with the rapidly evolving situation, we elected to discontinue the game.
The post mortem on this scenario is that the Union seems doomed for defeat thanks to the initial orders issued by Pope. These orders largely consign various Union formations to piece-meal, un-coordinated attacks - often against Rebel defenders holding superior ground - that rob the Union of any real chance to deliver a telling blow.
As mentioned, Pope's 0 leadership rating - and delay in arriving on the scene - makes it very difficult for the Union player to successfully change the above situation to avoid disaster. Much also rests on how quickly the two sides can bring in their reinforcements. We opted for the variable arrival rules, requiring a 10+ to be rolled for each formation. Unfortunately, the dice did not go in the Union's favour. In contrast, the Confederates were able to bring up Longstreet's corps pretty much on schedule. With Lee and Jackson's high command values, the Confederates proved much more effective at responding to the battlefield situation and seizing opportunities.
We certainly enjoyed playing this, especially given the uncertainty surrounding the arrival of formations and the potential that exists for manoeuvre.
Coming out of this, Roger and I have decided to try our hand at the full battle of 2nd Bull Run! The hope is that the much longer time-frame will allow the Union commander more opportunity to formulate and prosecute a cohesive offensive against those vile Rebels!
Friday, 23 September 2016
Game in Progress - August Fury - Second Battle of Bull Run, Day 2 - Part 1
Hot on the heels of our completion of a 1st Bull Run scenario from Three Battles of Manassas (MMP/The Gamers), gaming buddy Roger and I elected to graduate to a larger scale battle, allowing us to make full use of the Civil War Brigade series command rules. Logically enough, the choice was a scenario from August Fury II, covering the 2nd Battle of Bull Run: 6.2 The Second Day.
As both Lee and Pope are on the map, each can issue orders to their commanders as soon as their HQ's take up a position. Just west of Groveton wood, two of Jackson's blooded divisions have received orders (Jackson initiative) to push Union troops off Chinn Ridge and move on New Market. It looks like a pincer movement....Civil War style.
We opted to increase the uncertainty by adopting the variable arrival rule for reinforcements - requiring 10+ to be rolled before each due formation can enter the fray.
Here is a Vassal snapshot of the field of battle and objectives at 5am on the 29th of August, 1862:
Thanks to Pope thinking that Jackson is retreating westward, Union troops face a tough job in what amounts to hurried and piecemeal assaults against a Confederate corps holding strong defensive ground. Not only that, but one expecting reinforcements to soon come a marching down the Warrenton Turnpike.
As the initial orders for the Union corps have already been accepted, the Union player has little choice but to follow through in the hope that the rebel line can be penetrated. Attempts could be made to exercise divisional command initiative, but the odds are not good and there is an element of risk (rolling snake eyes activates the 'loose cannon' rule, allowing the opponent to control said division for one turn!).
The Union troops advance and carry out their assault.
7:00 am
Here is the situation two hours later:
On the Union left, the Rebels are pouring fire into Reynold's division...so much so, that they are already running low on ammo! But they are getting results and Reynolds' boys are crumpling under the withering fire...but not before Union artillery deal out some harsh treatment to Johnson's extended line (in the current turn, he will become disorganised).
Meanwhile, Sigel's corps has elected to ram into the centre of Jackson's line, hoping that a solid push on a narrow front will get results. The Rebs are dishing it out and Schimmelfennig's men have pulled back, disorganised. Yet, the Union are scoring hits too, with Trimble and Archer's veterans bearing the brunt.
The Union desperately needs its awaited reinforcements to arrive - now! But instead of Pope and two welcome corps, all that has shown up so far is Kearny and his three brigades, now advancing to join in the attack.
And Jackson is still alone...no sign of Lee and Longstreet.
9:00 am
Two hours later, little has changed. Kearny's brigades have badly bruised themselves attempting to push back A.P Hill's brigades defending south of Bull Run. Reynolds succeeds in cancelling the attack and has pulled back to Groveton to lick his wounds. In the centre, Union troops have sent Trimble packing, forcing him to abandon the railroad line....but Early and Gregg promptly fill the gap, robbing the Federals from securing their hard-won gain.
And off to the West, there are signs of an approaching column, while still no relief in the East for the Union.
11:00 am
By 11am, Lee and part of Longstreet's L-Wing has appeared on the scene and deployed on the Confederate right flank, forming a hinge. Un-nerved by the slaughter, Sigel has called off the attack (via a stoppage roll) and pulled back in front of Chinn's Ridge, east of Groveton.
Finally there is significant Union activity in the South, as Porter's 5th corps advances NW up the Manassas-Gainsville Rd. It has orders to occupy Gainsville to hold any rebel advance from the west. But the cat is already out of the bag!
13:00 hrs:
By early afternoon, Porter's corps has taken up position at Gainesville, waiting for rebels that have already passed them by. In fact, Longstreet's entire corps is now on the battlefield - half moving to a rendezvous with the Federals at New Market, while the rest are blocking the Manassas-Gainsville Rd.
As both Lee and Pope are on the map, each can issue orders to their commanders as soon as their HQ's take up a position. Just west of Groveton wood, two of Jackson's blooded divisions have received orders (Jackson initiative) to push Union troops off Chinn Ridge and move on New Market. It looks like a pincer movement....Civil War style.
Pope has appeared east of Hill's position....but it's too little, too late.
My next instalment will reveal how the rest of the battle plays out. So far, the result seems to generally reflect that of history: piece-meal attacks robbing the Union of the cohesiveness it needs to overwhelm the rebels, in tandem with an inability to swiftly adapt to the rapidly changing situation. The rebels get a jump on them, sweeping eastward in superior numbers. Jackson's high initiative value plays a telling role here, as does Lee's overall command superiority ('4' to Pope's '0'). Porter sitting there out west at Gainesville, doing nothing.....seething at the idea of taking orders from boastful Pope! In the end, it cost Porter his command...and career: court-martialed and cashiered from service.
Friday, 19 August 2016
My Most Highly Anticipated Games @ August 2016
Here are 5 games that I am looking forward to playing - hopefully within the next 12-18 months. Few of these are yet available - some are still sitting on GMT's P500 list, or equivalent.
After having gushed about FAB: Bulge being one of my top 5 games, it's little wonder that the latest FAB release from designer Rick Young has been on my radar for some time. I don't have a single Arab-Israeli War game in my collection, so this is the perfect opportunity to address that gap as well.
I'm hoping that this title will mark a return to the the ability of players to stage breakthroughs in the enemy line and exploit them using armour and motorised units. This feature of the FAB system shone in Bulge.
Check out the map:
FAB: Golan '73 is currently shipping.
This one still resides in the GMT P500 list and is slated for release in the first quarter of 2017. A big North Africa title is another gap in my collection and it is a conflict/theatre that has always appealed to me. It's a very different design approach from Raicer's Paths of Glory - it's not a CDG - but I think anything from Ted deserves close scrutiny. The sister game already in print - Dark Valley - covering the Eastern Front, was well received.
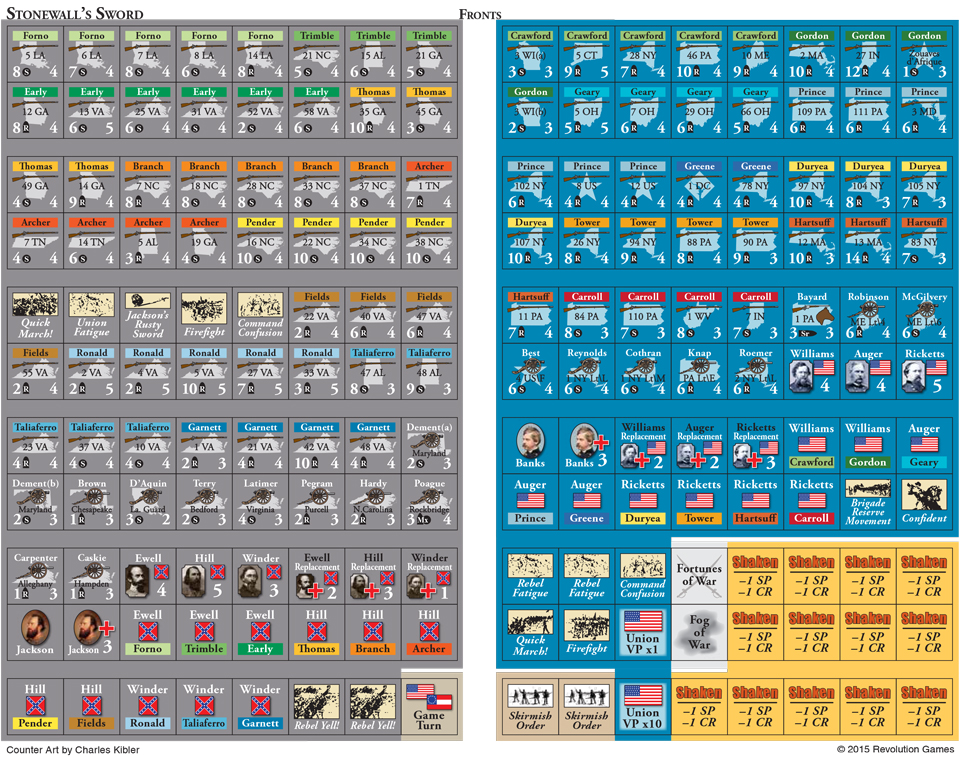
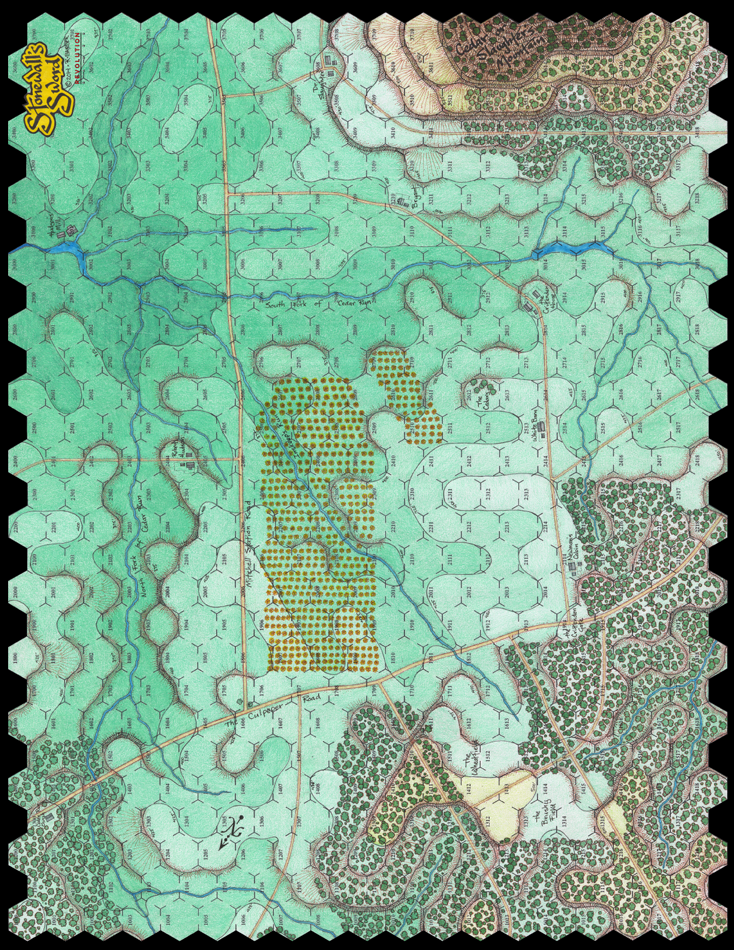
...as is the map, though it can be frustrating at times trying to work out the height difference between hexes (someone handily superimposed quick reference numerical height levels onto the map, available as a download from the BGG Stonewall's Sword site). In the image above, in addition to various units and commanders (who are activated by chit pulls), you can see some of the event chits (such as Command Confusion, which can be played on your opponent at an opportune moment in play).
Not surprisingly, I hope to acquire this title in the near future. The designer is Hermann Luttmann, which is a good sign that this is a quality ACW title. I also own his little solo game, In Magnificent Style, which is excellent. Support for the system in this game is gathering steam, with a further title - Thunder in the Ozarks (Pea Ridge) - in the works from Revolution Games, and one coming out from GMT, called Hammerin' Sickles (Longstreet's attack at Gettysburg).
Another title on the P500 list, currently yet to make the cut. I wouldn't be surprised though if this title is fast-tracked. It offers a fast-paced and fun card-and-map game for two or more players, that can conceivably be played within a couple of hours. All of this should be tonic to gamers - like me - in a mood for something lighter in style and approach. Mark McLaughlin is one of the designers too, so Napoleonic Wars fans, take note!
The GMT blog devotes some attention to this title and the cards look great. Here's a sample:
I'm following this one with much interest......
1. FAB: Golan '73 (GMT)
After having gushed about FAB: Bulge being one of my top 5 games, it's little wonder that the latest FAB release from designer Rick Young has been on my radar for some time. I don't have a single Arab-Israeli War game in my collection, so this is the perfect opportunity to address that gap as well.
I'm hoping that this title will mark a return to the the ability of players to stage breakthroughs in the enemy line and exploit them using armour and motorised units. This feature of the FAB system shone in Bulge.
Check out the map:
FAB: Golan '73 is currently shipping.
2. The Dark Sands (GMT)
This one still resides in the GMT P500 list and is slated for release in the first quarter of 2017. A big North Africa title is another gap in my collection and it is a conflict/theatre that has always appealed to me. It's a very different design approach from Raicer's Paths of Glory - it's not a CDG - but I think anything from Ted deserves close scrutiny. The sister game already in print - Dark Valley - covering the Eastern Front, was well received.
3. Wild Blue Yonder (GMT)
The Down in Flames series was pretty popular back in the 90s, spawning quite a few expansions. Somehow, that phenomenon passed me by (I had a long hiatus from board wargaming during the period). I'm now keen to make amends and welcome the return of this classic WWII tactical series, now given the deluxe treatment. Disappointingly, the title has been on the lists for some time, and is currently not slated for release until the second quarter of 2017. The slow pace in attracting support for it certainly surprises me. I look forward to playing the campaign games and hope that a 3-4 player variant will also be in the offing, allowing for some monster dogfights.
4. Stonewall's Sword (Revolution Games)
This title caught my attention earlier this year as it combines a tactical, regiment-level simulation of the battle of Cedar Mountain, with an interesting chit pull system. I subsequently downloaded the ruleset and Vassal module to give the game a solo spin. What resulted was one of the most enjoyable gaming experiences I've had in some time, even when playing solo. The uncertainty surrounding drawing chits - some of which assist you and some of which can hamper your opponent - makes for a lot of fun. You can also formulate strategy as to when you wish to play some of the event-based chits, for maximum effect.
The counters are very attractive:
Not surprisingly, I hope to acquire this title in the near future. The designer is Hermann Luttmann, which is a good sign that this is a quality ACW title. I also own his little solo game, In Magnificent Style, which is excellent. Support for the system in this game is gathering steam, with a further title - Thunder in the Ozarks (Pea Ridge) - in the works from Revolution Games, and one coming out from GMT, called Hammerin' Sickles (Longstreet's attack at Gettysburg).
5. Hitler's Reich (GMT)
Another title on the P500 list, currently yet to make the cut. I wouldn't be surprised though if this title is fast-tracked. It offers a fast-paced and fun card-and-map game for two or more players, that can conceivably be played within a couple of hours. All of this should be tonic to gamers - like me - in a mood for something lighter in style and approach. Mark McLaughlin is one of the designers too, so Napoleonic Wars fans, take note!
The GMT blog devotes some attention to this title and the cards look great. Here's a sample:
I'm following this one with much interest......
Thursday, 18 August 2016
COIN: Do I Give A Toss?
I sooooo much want to become a fan boy for one of the hottest game systems to emerge in the wargaming hobby in recent years: COIN. Short for 'counterinsurgency', in which - generally - each player controls one of 4 factions vying for dominance in a historical conflict, COIN has quickly morphed from dealing with recent conflicts in Colombia and Afghanistan, to the American War of Revolution and even - now - back to Caesar's Gallic Wars.
A fan of CDGs (card driven games), I was quickly attracted to the COIN system. To date, I have played Cuba Libre half a dozen times and Liberty or Death (which students of history unfamiliar with the game would quickly link to the American War of Independence) three or four times.
I have to say that I enjoyed my first games of Cuba Libre. Roger of the famous Roger's Reviews Geeklist on BGG handily summed this game up as being like a 'knife fight in a phone booth". From my experience, that's a very apt description. You're often into the action very quickly, with 4 factions duking it out for dominance on the non-too-roomy island of Cuba. The game narrative is dynamic and spirited, with a single card play capable of creating quite an upset to what had been the status quo in cosy Havana for instance.
But the Cuban magic started to wear off after I played a couple of games in which I controlled the Directorio (yellow markers) guerrilla faction. No matter how much I wanted to exercise the full palette of commands and special actions available to me, I could never quite seem to do so. Instead, I often found myself doing the same, repetitive command combination. Then I heard one of the other players express a similar sentiment about his own faction.
Yet, undeterred by this, I persisted with COIN and soon fastened my attention on Liberty or Death. Being a huge fan of Washington's War and the historical period and theatre in general, I went to quite some lengths to get hold of a copy before they sold out (ably assisted by the terrific staff at GMT in the US, I must say - a quality team). Besides, it's such a gorgeously handsome game, with first class components. Here's a taste:
Upon receiving my copy, I sooooo wanted - now - to be a fan boy of Liberty or Death. But, several games later, instead I've become a 'Doubting Thomas'. Maybe even a Benedict Arnold. Let me hasten to add that it's not that I have been punished by the game, to trail the field at the finish. Quite the contrary...in most of the games, I have come close to winning. It's more about the game experience that has left me a little cold. Let me explain. First and foremost, it is the sheer down time of waiting for your turn to come around again. This is of course an issue with many 4p games in which player interaction can be minimal. But in COIN, this feeling is intensified by the fact that there is often little to be done when your turn does come up. For a start, depending on the eligibility table on the game map, you may either choose the event on the card, or exercise a particular combination of command and (possibly) a special ability. That may seem fine, but some of the commands are specific to a particular situation in the game, so can often be ruled out. At least in my experience, what normally results then is that you either go for the event or enact the usual command that you have become accustomed to. Mustering with the British. Rallying with the Patriots.
Whatever you choose, the sum total is that you often find yourself doing a few small actions on the board, before handing the baton (figuratively speaking) to the next player....before resuming your snooze. This is particularly the case if all you have at your disposal is a limited command, restricted to a single area.
Gaming buddy Steve shares my views on COIN. He points out that one of the pleasures of CDG games is that you receive a hand of cards, which then allows you to plan your intended strategy for the turn, taking advantage perhaps of the combination of events and 'op points' on offer. The intrigue is seeing if the strategy can be implemented....largely depending on whether it survives 'contact with the enemy'. This approach to gaming supports conceiving an overall plan....strategic goal setting. By permitting you to only respond to a single card, COIN is a much different ball game....you never know what your next option is likely to be. It's piece-meal.
This probably sounds overly critical, but my experience of COIN thus far often leaves me somewhat frustrated and feeling like a kind of machine attendant, in which the machine is the game system. A gaming buddy of mine who now avoids COIN games, quipped that you don't play the game, it plays you. I can't help but feel that there is more than a grain of truth in this.
Of course, COIN now has a legion of fans....so it has to be doing a lot right, doesn't it? Are they deluded, or am I just a lonely voice, signifying little? Certainly, I would love to hear the views of other gamers. Perhaps my viewpoint can be rehabilitated. That would be nice, especially as Liberty or Death now takes up considerable space in my game collection. Sometime, someday, it WILL return to the table. For deep down - in the guerilla-infested forest of my mind - I still want to love COIN games.
Thursday, 4 August 2016
Jena (Clash of Arms) Game Report
Roll on with another Napoleonic title! This game report has been reproduced from the BGG original by the kind permission of its author and local gaming buddy, Steve. Steve has a voluminous game collection to say the least, but if one can detect any salient themes, an abiding interest in Napoleonic gaming would be one of them.
Take it away, Marechal!
Publisher: Clash of Arms games, 1996
420 counters, comprising mostly combat units are nicely functional with uniform colours forming the basis of the design and back printed with the national flag for each side. Information is kept to a minimum with strength points (each representing 1000 infantry, 500 cavalry or an artillery battery), morale ratings from 1-6 and movement ratings.
Take it away, Marechal!
Game review: Jena: Napoleon Conquers Prussia - October 9-16, 1806.
Publisher: Clash of Arms games, 1996
Designer: Ed Wimble
Having been prompted by a recent discussion on Napoleonic tactical/operational game systems to revisit this game, I was astounded to discover that there were no reviews on BGG…this is my attempt to remedy this sad state of affairs.
Designer Ed Wimble is better known as the main man behind ‘Clash of Arms games’ and also as something of a Napoleonic expert for his work on the 'La Battaile' series of game, probably the most detailed tactical level games on the era. Fortunately in this game the designer has taken a broader view and designed a game on the campaign itself.
As Ed writes in the designer notes, ‘Prior to making a study of Napoleon’s 1806 campaign, most of what I knew about it was from general histories. Because of this I was very reluctant to develop a game on the subject. It seemed too one-sided. I asked myself, “Who would ever want to play the Prussians…?”’
Fortunately for those with a desire to refight the campaign, the designer’s interest was piqued by a visit to the region and a shift in focus from the disastrous (for the Prussians) battles of Jena-Auerstadt to the manoeuvring that led to the battles. The game focus is therefore very firmly on the opening weeks moves of both sides, which in effect was the Napoleonic version of ‘Blitzkrieg’. Essentially the much vaunted Prussian Army, still resting on Fredrickian concepts of warfare was shattered in a week of combat and totally demoralised after a lighting six week pursuit by a French army at the top of it’s game.
The game is therefore clearly focussed on the operational aspects of moving Corps and divisions to bring the most effort to bear when a battle is joined. The game system is based on Ed’s earlier offering L'Armée du Nord, and is ideally suited to the portrayal of key events without getting bogged down in detail. The game forces the player to act like an overall army commander and for those that have read the classic books on the campaign, such as F.L Petre’s ‘ Napoleon’s Conquest of Prussia’ or Colonel Vachee’s “Napoleon at work’, it really helps bring the dilemmas faced by both sides into view.
Components
Jena! Is an impressive looking game and if ever a game was sold by its cover, then this is it. A dramatic painting by Edouard Detaille of the French 4th Dragoons making off with Prussian trophy graces the box top. Three full 34” x 22” game maps provide the next hook. Beautifully rendered in autumn tones by Rick Barber they portray the campaign area in an almost contemporary way. Roads are lined with rows of trees, villages and towns dot the landscape and slopes and hills are rendered functionally. To add period feel, the terrain features and locations are rendered in Teutonic script. You almost feel like a commander poring over a map from the era. Map scale is roughly 1km per hex.
![]() |
| This photo by Mark Mokszycki shows a portion of the south map. It's one of three such maps, so don't attempt without a large table! |
The full campaign does take a lengthy table area, but the good news is that there are numerous one-map scenarios to provide a taste of the system and replay key moments of the campaign.
420 counters, comprising mostly combat units are nicely functional with uniform colours forming the basis of the design and back printed with the national flag for each side. Information is kept to a minimum with strength points (each representing 1000 infantry, 500 cavalry or an artillery battery), morale ratings from 1-6 and movement ratings.
The rulebook is a concise 16 pages, which also includes 3 pages of scenarios and setups, so the core rule systems are essentially 12 pages in total, making it an easy game to learn and start playing.
The package is rounded out with an Off board movement track, which is used by the Prussians to bring units on to he main map and several cardstock play aids contain turn tracks, combat results table, bombardment effects and terrain effects chart.
The size of the map ensures that there is relatively little crowding and gives the Prussian player plenty of scope to trade countryside in the face of the French onslaught until they can determine where the main thrust will be delivered. There are plenty of rivers and high ground to ensure that the Prussian can choose good defensive terrain to balance out some of their tactical deficiencies when the battle is joined.
Game play
Whilst it has been over ten years since I actively played this game, I still have vivid memories of a number of campaigns that were played out and hung in he balance at times until the very end game. Whilst things do appear grim for the Prussian player, his war-game counterpart is not bound by the same errors and muddled thinking that plagued the Prussians in reality. The game system gives the French player better command control to manoeuvre units, but the back printed counters are utilised to provide limited intelligence so that each player is never quite sure which commander and force he is up against until the battle is joined.
Combat does have tactical nuances with rules for cavalry charges and bombardment to provide the feel of Napoleonic warfare. Morale is also a major aspect of the system and often you will see your troops melt away in defeat, but prudent use of terrain for the Prussians enables them to rally units back to he colours and fight another day and for the French it is a race against time to capture a much ground as possible, to ensure that shattered Prussian units stay in the dead pile.
For more detail on the system I refer to a previous review by duckweed on L'Armée du Nord which uses the same core mechanisms http://www.boardgamegeek.com/thread/108867/a-brief-review-of...
Overall I cannot recommend this game highly enough. Some errata is needed to resolve minor issues, but not to the extent of detracting from the game. In revisiting my copy I found numerous patient replies to my written enquiries from the designer. None of the errata I requested was overly detrimental to play of the game at the time. If you can find a copy and you are interested in the era then don’t hesitate to buy!
In terms of book companions to the battle and the period, Steve recommends the following titles:
Great review - thanks Steve!
Subscribe to:
Posts (Atom)